Automations: Overview
The doo automation module allows event organizers to automate repetitive tasks and processes and connect doo with other programs – without the need for developer help. For example, you can:
- automatically promote new doo events online
- book accommodations for your participants
- automatically send attendee certificates or surveys at the end of the event
- forward invoices to your accounting department
- automatically inform internal departments, account managers or external partners about new registrations
1. doo automations overview
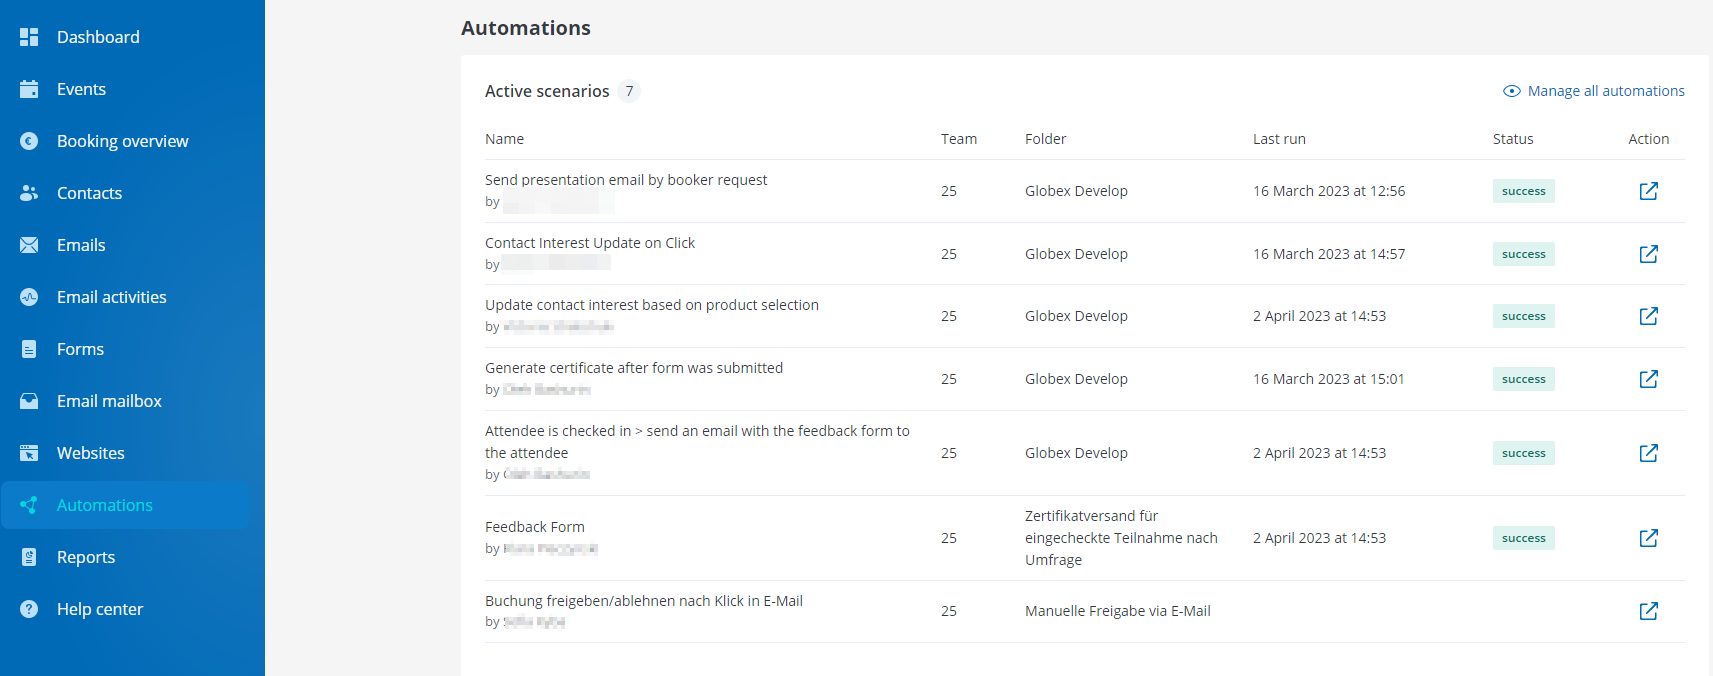
You can access the automation module after activation by the doo service team via the corresponding menu item in the left sidebar.
You will then be shown all active scenarios (= automated workflows) of your account. To directly access the details of a scenario from the overview, click on the icon in the “Action” column. If you want to see all automations including the inactive ones or create new scenarios, click on “Manage all automations”, which will take you to your automation builder.
Before doing so, you must confirm the login with your doo account once.
2. What is where? Navigation in the automation building block
The doo automation toolbox is based on the Make.com automation platform from our partner Celonis and is only available in English.
What you are shown, what you can access and what you can actively manage depends on the role assigned to your user account. The following explanations refer to the view for administrators, who can view and manage all areas.
2.1. Organization
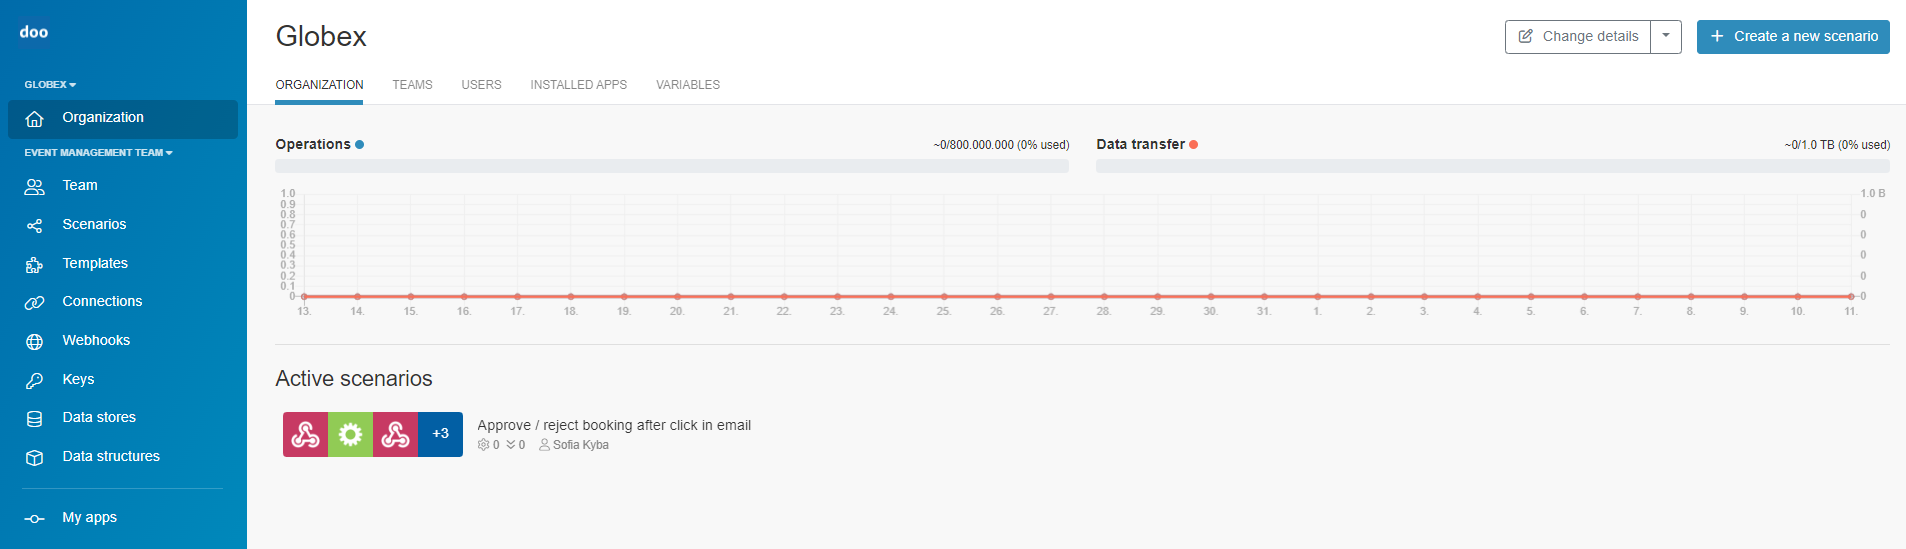
You can access the general dashboard of your automations via the “Organization” item in the left sidebar.
Using the small dropdown in the upper left corner, you can see which organization account you are currently accessing. If you have access to multiple organization accounts, you can switch between them by clicking on the dropdown.
On the dashboard, under the central “Organization” tab, you can see the activity of the last 30 days – how many operations (= actions performed by a scenario) have taken place in your organization account and how much data volume has been transferred? Below that you can see the scenarios that are currently active.
In the next tab “Teams” you can manage the teams of your organization – the users of a team can access the same scenarios. Dividing your users into teams can be useful if, for example, several departments use the automation platform independently of each other and the employees should each only access the scenarios of their own team. A user can also belong to several teams at the same time.
Under the next tab “Users” you can see the list of users who have access to your automation account.
In the next tab “Installed Apps” and “Variables” you can see which apps are installed for your account and the existing organization specific variables with the possibility to create additional variables to use them in scenarios.
At the top right you can create a new scenario by clicking on “+ Create a new scenario“. This becomes visible for all team members under the menu item “Scenarios” after the first save.
2.2. Team
Below Organization in the left sidebar, you will find another small dropdown that allows you to see which team you are currently accessing. If you are a member of multiple teams, you can click the dropdown to switch between them.
Then, under the “Team” item in the left sidebar, you will find the team-specific dashboard with the operations, data transfer and active scenarios of the corresponding team.
Using the middle tabs, you can again access the team members under “Users“.
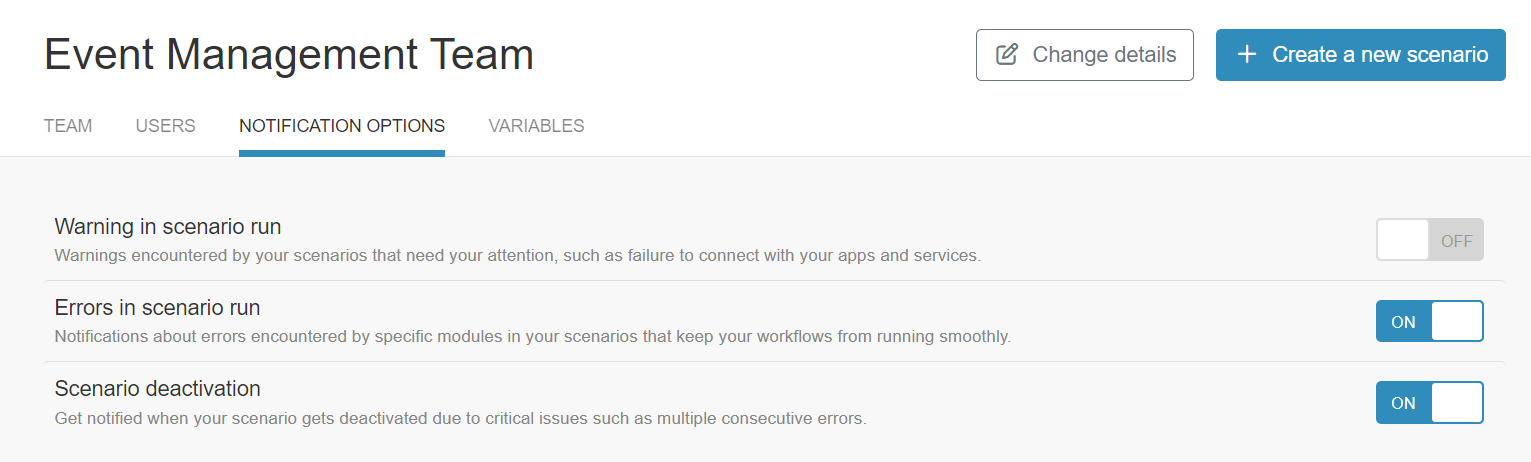
Under “Notification Options” you can set in which cases email notifications should be sent to all team members.
- Warning in scenario run: Warnings if there are problems in a scenario that should be checked, such as connection problems to the integrated app.
- Errors in scenario run: Notifications if individual modules of a scenario disrupt the smooth running.
- Scenario deactivation: You are informed if a scenario had to be completely deactivated due to critical problems.
Under the “Variables” tab you will find the team-specific variables such as name and ID, as well as the possibility to add your own variables.
2.3. Scenarios

Under the menu item “Scenarios” you will find all scenarios that have been created by this team so far with the corresponding status. What exactly a scenario is and how to create and edit it, you will learn here. You can activate and deactivate scenarios via the button on the right side. Using the dropdown next to it, you can assign the scenario to a folder, copy it (“Clone”) or delete it (“Delete”).
Using the top navigation of the respective scenario lists, you can switch between active, inactive and drafts.
On the left side you can search for scenarios and create a folder structure. Use the “+” symbol behind “Folders” to create new folders. A folder structure makes sense especially when several scenarios are needed to automate a more complex process – i.e. when several scenarios have to work together to completely map a workflow. Existing scenarios can be dragged and dropped into the appropriate folder. To delete an existing folder, click on “Options” → “Delete folder” at the top right.
2.4. Templates
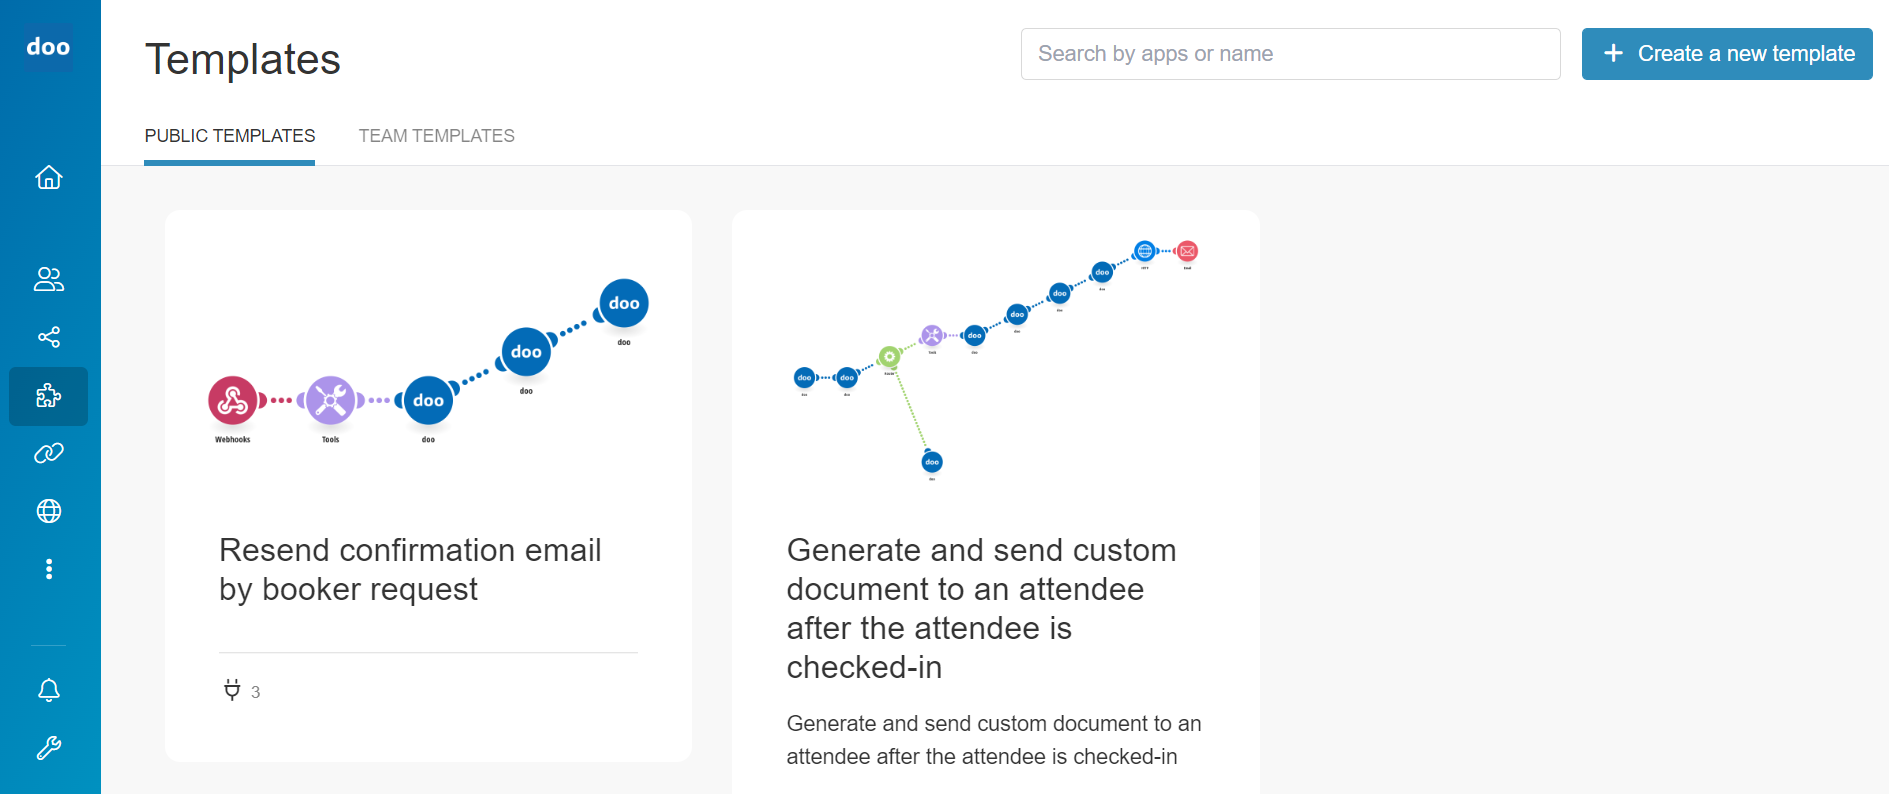
Via the menu item “Templates” you can view the scenario templates that are available for your account. You can choose between “Public Templates”, which are available to all doo users, and “Team Templates”, which have been created by your team. How to select a public template and tailor your individual scenario from it, you will learn here.
2.5. Connections
The item “Connection” lists the personal access data of the apps that have been used in your scenarios so far (e.g. the connection to your doo organization, your Google or social media account). Connections are set up directly in the scenario. In this overview, you can verify the existing connections and, if necessary, reauthorize them by logging in again, as well as delete connections that are no longer needed.
2.6. Webhooks
Using this menu item, you can access an overview of all webhooks that have been used in your scenarios so far. Webhooks are the trigger modules that you have built into your scenarios as triggers to activate them in certain situations. In this overview, you can manage the webhooks, view details, activate and deactivate them, call up the associated scenario, and delete webhooks that are no longer needed.
2.7. Keys
If you have assigned unique names to the data sets when creating a new data store, these will be listed in the “Keys” overview.
2.8 Data stores
If you have used data store apps in your scenarios to store data, they will be listed below the menu item “Data Stores” and can be managed there and the contained data can be viewed.
2.9 Data structures
If you use modules that require data structure specifications to describe the format of incoming data (e.g. for JSON, XML, CSV data), you can access and manage the corresponding documents under “Data Structures”.
3. Further help
In our help center you can also read a doo-specific guide on how to create and edit a scenario as well as an overview of the most important terms used in our automation platform.
A very detailed documentation of all components as well as online courses on how to get started and use the platform can be found in the help center or the Academy of make.com, the software on which our automation platform is based.