Create and edit a scenario
To automate a process using the doo automation module, you need a scenario. Learn here how a scenario is structured and how you can create a new scenario or edit an existing one.
1. Basic logic
A scenario is a string of different modules, each defining what data should be processed and how. By chaining modules from left to right, you can define when or by what means the process should be started and what should happen with which data to ultimately achieve the desired goal of automation. Here, you have a huge range of modules from a variety of vendors as well as additional tools and filters at your disposal. The most important terms are explained here. So, depending on the use case, a scenario consists of a combination of doo modules and the modules of other tools such as Google, Microsoft, social media platforms, chat programs or CRMs.
2. Begin a new scenario
2.1 Build a scenario yourself
You have the possibility to create a scenario completely by yourself by clicking on “+ Create a new scenario” in the upper right corner.
2.2 Use a template
Alternatively you can use one of the prefabricated templates. The templates are provided doo and contain instructions on what to do to configure the scenario. Especially for new users of the automation module they can help to understand the logic of scenarios.
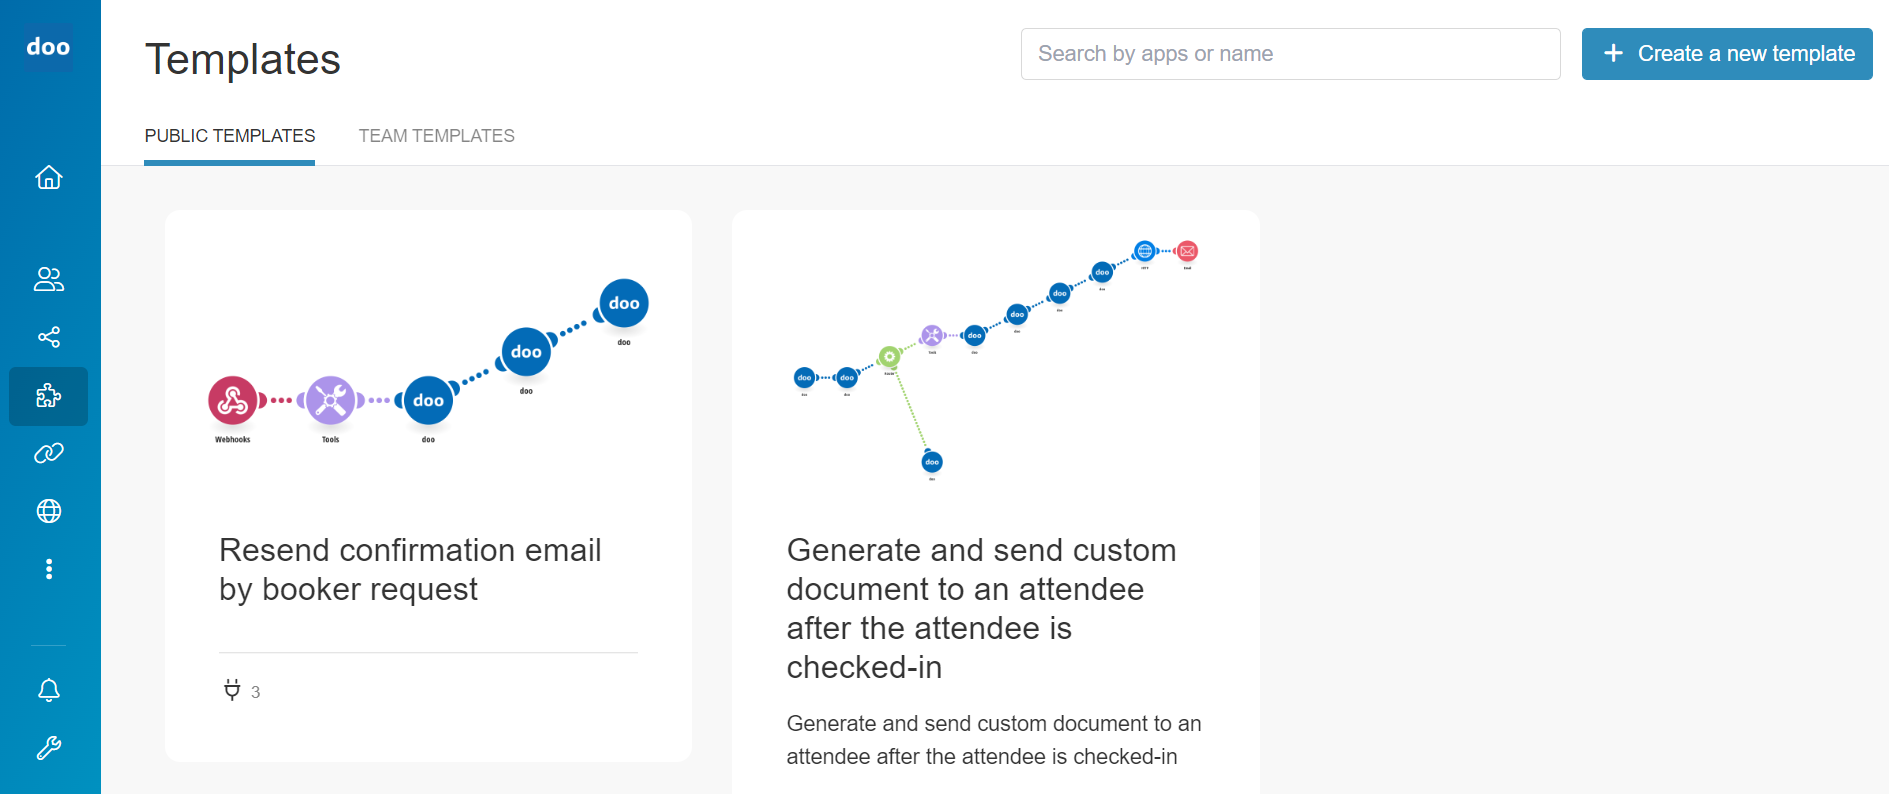
The available templates can be found under the Templates item in the main menu bar on the left.
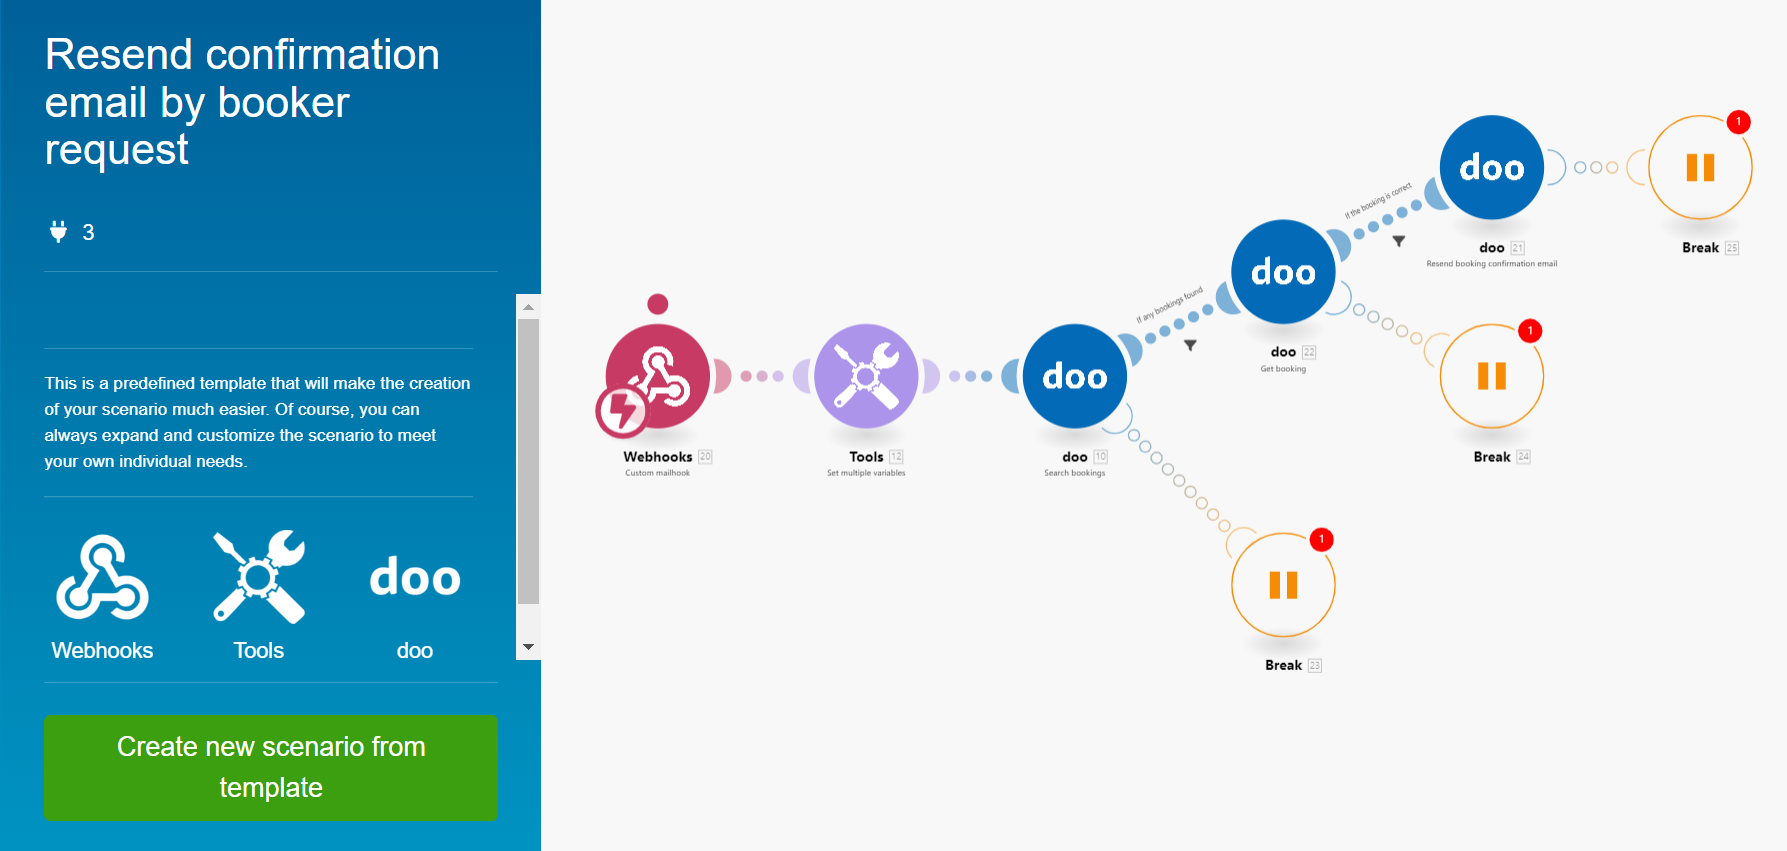
If you click on one of the public templates, you will see an animated preview of the scenario with the corresponding modules, tools and filters. By clicking on “Create new scenario from template” you can create a new scenario based on the template. In the next step, you have to configure this scenario for your setup, for example, you have to enter the access data for accessing applications. If necessary, you can then adapt the scenario to reflect your individual process.
2.3 Scenario-editor overview
-
When you start a new scenario, you should name it as soon as possible and then click the save icon at the bottom of the toolbar to easily find the scenario again.
-
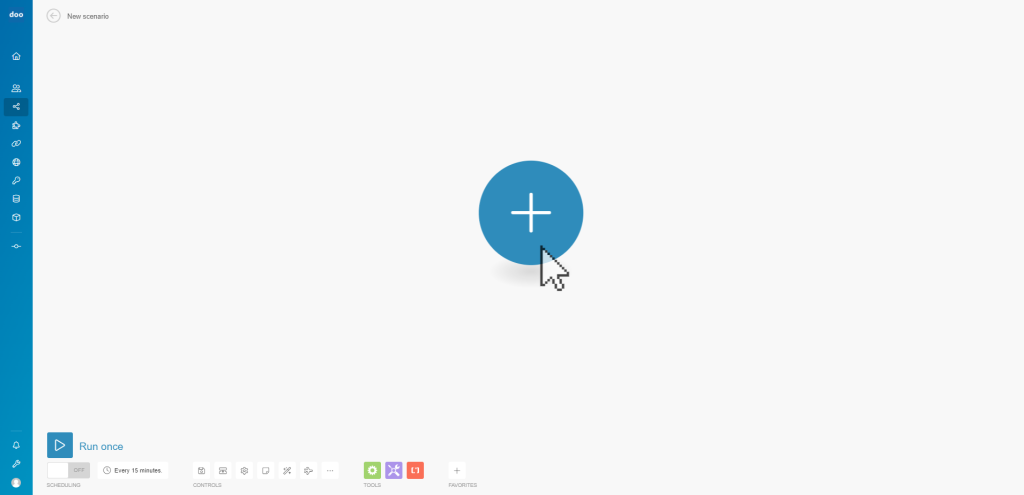
If you are not using a template but creating your scenario from scratch, you can start creating your scenario by clicking on the plus sign to select the trigger module through which the scenario will be triggered.
-
By clicking on “Run once” you can test your scenario.
-
Via the “Schedule” button you can select a time interval in which your scenario should be triggered.
-
Using the toolbar you can save your scenario, access the settings and add notes. The magic wand icon gives your scenario a neat appearance, and clicking on the airplane icon starts an animated demonstration that shows the sequence of the process. The More button lets you import or export blueprints of the scenario, as well as reset the scenario to an earlier version.
-
In addition to the modules of apps, a variety of other tools can be integrated into a scenario for specific functions. These tools are divided into “Flow Control“, “Tools” and “Text parser“.
-
If a module or tool is used frequently, it appears in the favorites. You can also add your favorites manually.
2.4 Set up connection to your doo organization
If you want to use a software, in most cases you have to log in before you can access the data and functions. This is also true for automations. Most modules require login credentials to access the respective program.
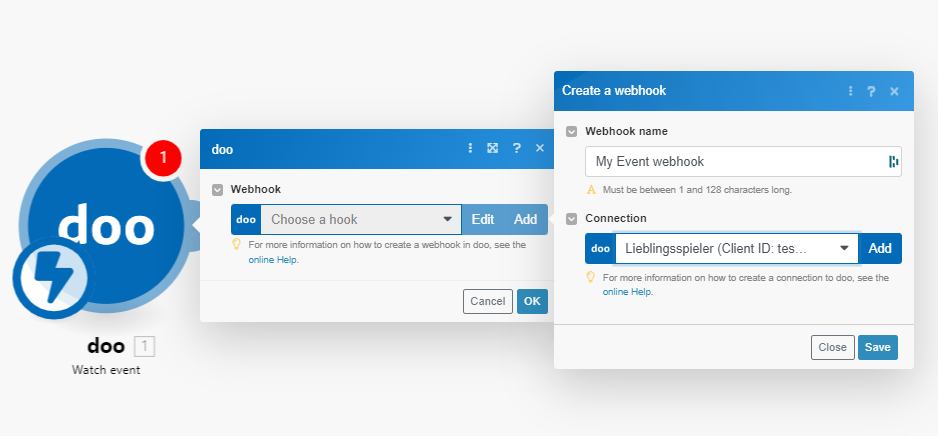
If you use doo module, you will be asked to select a connection. If there is no connection defined for your account yet, we will show you how to set one up here.
Click on “Add” at “Connection” in the module settings dialog. You will now be prompted to enter any internal name for your administration as well as a Client ID and a Client Secret.
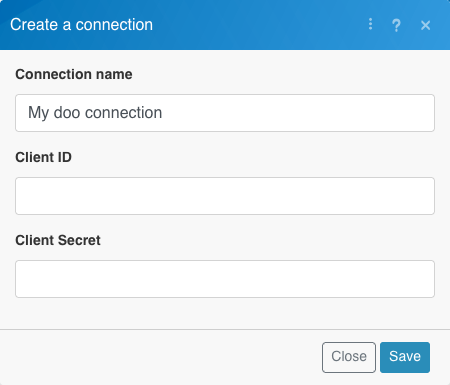
To do this, go to the organization settings in your doo organization (gear icon in the header bar). For this you need administration rights. Then select the tab “Users” > “Client credentials”. Client credentials are quasi username and password for technical applications. Assign any internal name and click on “Create”.
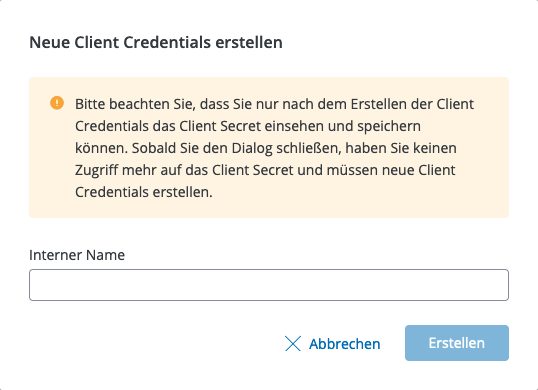
doo now generates Client ID and Client Secret. Please note that the latter value cannot be retrieved after closing the pop-up. So do not close the pop-up until you have set up the connection in Make. You can also save the values in a dedicated password manager. The data is as sensitive as your own doo login data, so be careful not to save it unprotected.
Copy the values into the module settings dialog and save them. Make now verifies the login data. If this has been completed successfully, you will now see the name of the connection selected. You can use this connection in other scenarios in the future by selecting it from the dropdown.
3. Build and edit scenarios
3.1 General instructions
For a general step-by-step guide on how to create a scenario, we recommend the Academy of Make (the software on which the doo automation platform is based) and its help center.
Here we want to focus on specific scenarios and doo modules that can be used to automate processes in event and attendee management.
3.2 doo modules
From doo there are a variety of trigger and action modules, which in combination with each other as well as in interaction with the modules of other apps can automate the most diverse processes in event and attendee management.
3.2.1 doo module types
If a scenario is to be triggered by a certain activity in doo, for example when a new booking is received or a new event has gone live, the corresponding module must be selected as a trigger. Triggers can either be modules that are labeled “Instant” in the doo module selection list or any other modules for which you can specify the time interval at which they should be activated before starting the scenario.

The doo modules are divided into the following categories: Event, Booking, Attendee, Contact, Form, Auto Email and Other. When selecting a module, you should carefully consider which data from doo you need for your automation.

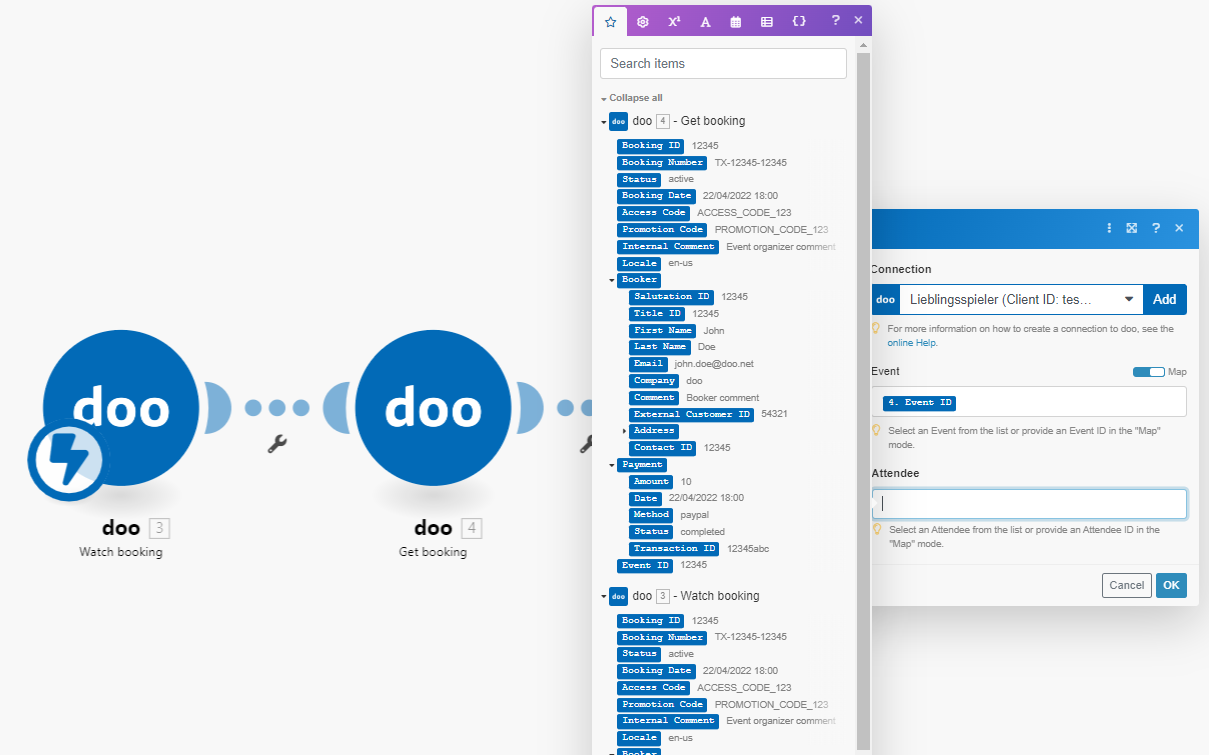
Each module includes certain data sets that can be accessed by the subsequent modules. For example, the “Get event” module contains the event ID as well as the name, date, status, address of the event etc..
To see what data a module can pass, you can right-click on the module and select “Run this module only”. By clicking on the thought bubble with a number that appears afterwards, you can call up the data set and view the details of the executed operation. A distinction is made between Input (On which database was the operation executed?) and Output (Which data was delivered?). The output data of each module used can be accessed by other modules in the further course of the scenario using the mapping function.

Often the data of a single doo module is not sufficient to automate an event process. For an auto-email to attendees you might not only need the attendee data, but also the respective booking number and event details. In order to retrieve this data for the individual attendees, further modules (in the mentioned case e.g. “Get booking” and “Get event”) have to be lined up behind the Attendee module in order to get all the required data for the email.
3.2.2 Configuration
Once you have selected a doo module, it still needs to be configured. For example, depending on the module type, the webhook of the corresponding doo organization or the ID of a specific event, form or auto-email must be selected to determine which data should be accessed.
For many modules, you can either select a specific ID from a list during configuration (e.g. a specific event ID to include only this in the scenario) or alternatively activate the mapping function. You will then see all the output data from the previous modules that the current module can access using mapping. For example, if your scenario should not only refer to a specific event, but should dynamically retrieve the corresponding event data from your doo account for every incoming booking across all events, you can drag and drop the “Event ID” of an already used booking module into the corresponding field. This way, all events of your doo organization will be considered in the further run of the scenario.
3.3 doo Auto-Mails
In order to send automatic emails to your contacts, participants or even externals, we recommend creating auto email templates for this in doo in advance. This way you can use our email editor to design your message as usual in your individual design and with all available placeholders. You can access all live doo auto emails using the “Send auto email” doo module and thus automate the sending using your scenario.
For more information on creating auto emails, click here.
3.4 Edit existing scenarios
General information on how to edit an existing scenario can be found here.
At this point we would like to give you additional tips & tricks on how to edit the doo templates or other existing scenarios in the easiest way.
4. Example scenarios in event management
To illustrate the general logic of automation scenarios, this article explains some scenario examples.