Creating, testing and sending email messages
With professional email messages in your desired design, you can directly invite your contacts to your events, send current information about your event to a selected contact group, inform them about the cancellation of an event, or send a thank-you or follow-up email after an event.
The doo Email Manager is an optional feature that can be activated for your doo account for a monthly fee. If you are interested in an offer, please feel free to contact your doo contact person or our Support Team at any time.
1. Creating an email message
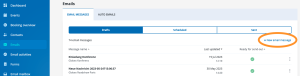
To create an e-mail message, select the “Emails” menu item in the main navigation bar. Now click on “+ New email message” in the Tab “Email messages”.
Assign a name for the internal management of your email message. Then select the associated event and the message language. This information is important for resolving merge tags such as salutation or event name.
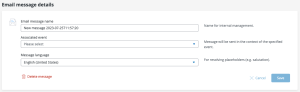
By clicking on “Save”, the draft is saved and you can continue with the send-out settings, recipients, design & content and other settings for the message.
1.1. Send-out settings
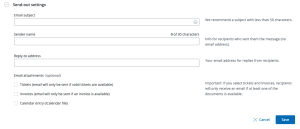
Choose an appealing subject line for your message. We recommend selecting an email subject with no more than 50 characters to ensure the subject is fully displayed in your recipients’ email programs.
The sender address for doo email messages is by default einladung@doo.net. As a reference for the recipients, you can also enter a sender name, which will be displayed to the recipients in their inbox before the doo sender address. Choose the name so that recipients can clearly identify you – this increases the likelihood of the email being opened. Upon request, it is possible to set up a custom sender address for your doo emails. You can find more information about this here.
Replies to your message will automatically go to the reply address you specified.
In the send-out settings, you also have the option to add attachments to your email message:
- Booking documents such as tickets or invoices: Please note that in this case, only contacts for whom the corresponding booking documents are available will be contacted – otherwise, they will be skipped during sending.
- For tickets, contacts associated with either the booker or an attendee will receive the email. For bookings with multiple tickets, a ZIP folder with all ticket files will be attached no matter if the email is addressed at a booker or an attendee contact. The prerequisite for sending is that tickets are already available for the booking.
- For invoices, only contacts associated with the booker will receive the email, provided an invoice is available for the booking. If the booking has been partially canceled, the current invoice and the last cancellation invoice will be sent; for fully canceled bookings, the cancellation invoice will be sent.
- If tickets and invoices are activated in the same email message, booker contacts will receive all documents, while attendee contacts will only receive the tickets.
- The email will always be sent to the contact’s email address, not the booker’s or attendee’s.
- If you want to send emails to the booker’s or attendee’s email address or attach custom documents such as certificates, please use the auto-emails.
- Calendar entry: The entry will be created as an iCalendar file for your event, so the appointment can be saved in the recipient’s calendar. You can specify the description added to the entry in the “Information” step of event editing.
- File from custom event field as attachment: Here you can add files from custom event fields that you have uploaded for this event as an attachment. Use this feature, for example, to send a program or site plan. Learn how to create a custom event field in the article “What are event fields and how to use them best“.
Tip: Please note that sending calendar entries may cause display issues with images in Outlook due to Microsoft’s restrictions. If you want to use this feature, we recommend designing your email so that it makes sense even without images. Alternatively, you can include the calendar entry as a button or link in your message instead of sending it as an attachment – you can find instructions for this here.
Important: The larger the attachment of an email, the greater the risk that the recipient’s mail server will mark the email as spam or reject it entirely. Additionally, large attachments cause long loading times upon delivery. Therefore, we recommend ensuring that your own files are as small as possible. Emails with attachments over 10 MB will generally not be sent by doo, and the recipients will be skipped.
1.2. Recipients
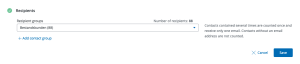
In the recipient dropdown, you can select the recipient group to which the email message should be sent. Read this article to learn how to create a corresponding contact group in advance.
Under “+ Add contact group,” you can additionally select more recipient groups.
Please note that your recipient lists must be up-to-date, and the maximum number of contacts you can initially email is limited. You can find all the information on how to prepare your contacts for sending with doo and gradually increase your limit here.
1.3. Design & content
1.3.1. Templates
Click on “+ Select template” and choose an existing template or the option “Start from scratch”
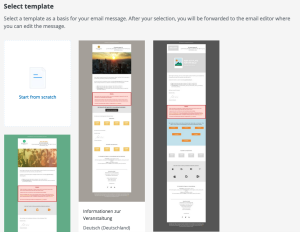
We recommend using one of the templates and removing the unnecessary rows or content from it. However, you can also start without a template and create your own message from scratch. Upon request, we can also create an individual template for you. Please contact your doo representative for more information.
Whether you choose a template or start from scratch, the next step will take you to our email editor. A detailed guide for the doo email editor can be found in the following article. For RSVP, code, and feedback or survey campaigns, there are specific contents that you can insert into the email editor, as described below.
1.3.2. Invitation emails with RSVP – Tracking registrations and declines
If you want to use your email message as an invitation to your event, it is advisable to insert the special links “Register” and, if desired, “Decline” and/or “Maybe” into your message, for example as buttons. Once the links are included in the message and you go back to the message details, you will see additional configuration options in the event invitation settings (see below). You can use these to define what should happen when the link is clicked. For example, you can pre-fill data or query reasons for declining. You can also combine RSVP messages with a code dispatch at any time (see below).
If you have inserted the invitation links into your message, you will see the response of your contacts to the email in the performance report. If you invite in multiple waves or send reminders, the invitation list for the event helps you keep track of the status of the invited contacts across messages.
Note: The decline link allows people to decline the invitation, but not to cancel their booking once they completed their registration. If they click it after booking, they will see a notice that the booking must be canceled if they do not attend the event. If a contact declines an invitation (without having booked previously), the contact can still register for the event via the registration link if they change their mind.
Tip: You can use URL parameters to more granularly define the behaviour of the widget after your recipients follow the “Register” link. For example, you can pre-fill the booking process and even skip steps. To use URL parameters, simple append them to the special link placeholder. You can use other merge tags within the URL parameters. However, make sure to use URL encoding to create valid URLs. URL encoding is available as a Liquid filter.
1.3.3. Sending promotion and access codes via email message
To send promotion or access codes via email message, add the merge tag “Code” and/or the special link “Register” to your message. The merge tag will be replaced with the actual code that the contact can redeem for your event. If you include the special link “Register” in your message and you define a code list for the message, the booking process is already pre-filled with the code once the recipient follows the Register link. So they do not need to copy it separately.
To define which promotion or access code should be distributed with the message, go to the event invitation settings after you left the email editor (see below). There you will find an option to select the desired code list. For single-use codes, there must be at least as many available codes in the list as recipients, as each code is linked to a recipient contact during dispatch, similar to personalizing access codes. You can see how many codes have been redeemed in the performance report and under Promotion codes or Access codes in the event settings. In the contact details, you can see all codes assigned to the contact across events, as well as their redemption status.
1.3.4. Email messages and doo Forms: Send surveys or feedback requests
To link to a doo form within an email message, you have several options:
- Use the standalone page with the form that is automatically used for each form by doo. Use the page URL as a link within your message.
- Embed the form on your website. To do this, take the widget code of a booking widget without event information and add the code parameter for the form mode to the widget code. Then link to your website within your message.
- Link to your event website with the embedded widget in your message and append the URL parameter for the form mode to the link to the event website.
- Using the URL parameters, you also have the option to pre-fill questions. For data protection reasons, we recommend doing this only with non-personal data. For example, you can include an icon bar with a star rating in your email. Depending on which star the person clicks on, this answer will be pre-filled in the form for the star rating.
1.4. Event Invitation Settings
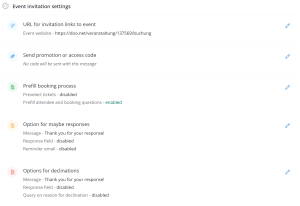
Depending on whether and which merge tags and special links you have included in your message, you will see additional configuration options under “Event Invitation Settings” at the bottom of the page of your message details after saving the current design and content of your message.
- If you have inserted an invitation link, you can specify the URL that should be called when the registration link is clicked and through which the registration should take place. By default, the event website of the event in the message language is stored here. You can adjust this at any time. However, make sure that the stored page contains a doo widget. Also, ensure that for multilingual events, the language of the stored page matches the language of the message.
- If you have inserted the “Register” link and/or the “Code” merge tag, you can select a promotion or access code list that you want to distribute with the message.
- For the “Register” link, you can set whether you want to pre-select tickets, whether the recipient can change the selection you made, and whether attendee and/or booking questions should be pre-filled with the recipient’s data from the contact center. The setting to lock pre-filled data from editing is available in the event editing “Attendee data”.
- For the “Maybe” link, you can define a message that your recipients will see in the widget after clicking the link. You also have the option to offer your recipients an optional free text field for individual feedback. Additionally, you can decide whether recipients can order a reminder email – in this case, the email message will be sent to the recipient again at a time you specify.
- For the decline link, you can also define a message to the recipient. You can also query the reason for declining via an optional free text field or a list you define.
Note: Except for the URL and the selection of the code, you can change all settings for the invitation links even after sending.
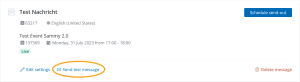
2. Test message
We recommend that you first send each message to yourself or a test group consisting of yourself and possibly some colleagues before sending it to the actual recipient group. This way you can check the correct display and links as well as the output of placeholders. From our experience, it also makes sense to have a look at the message on a mobile device.
After you have clicked on “Send test message”, you can select either individual contacts or a contact group as recipients. All recipients must already be created as a contact in your contact center. How to create contacts manually or import them into doo, you will learn here. How to create a new group in your contact center for your test recipients from existing doo contacts, you will learn here.
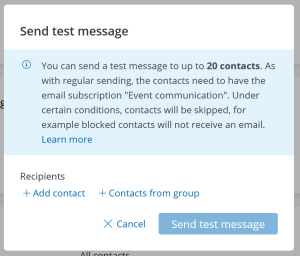
After the test send, you can still make any changes to the settings, design and content of your message and then start another test send again if necessary. You can send as many test messages as you like. You can find the test sends in the overview of email messages under Sent > Tests.
3. Sending the message
Once the draft is finalized, you can schedule the actual send and select any future time for the message to be sent to all recipients. As long as the message has not yet been sent, you will find it under the “Scheduled” tab. There, you can view the message at any time and stop the send if necessary.
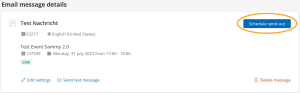
After sending, you can access the message via the email message overview under the “Sent” tab.
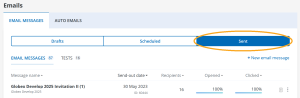
Through the overview of sent messages, you can access the message evaluations at any time in the performance report. Additionally, you can copy the message.
Note: At the time you specify for the start of the sending, the sending of the email message will begin. Especially with many recipients, the dispatch period can extend over several minutes or hours. The load on the platform may also affect the sending speed. This is technically determined, and we cannot change this behavior.
4. Adding Recipients to an Already Sent Email Message
Even after you have sent your email message, you can still add new recipients or resend the message to existing recipients if, for example, they accidentally deleted it. The prerequisite is that the person you want to send to is an existing contact.
You can find the option for subsequent sending either in the message overview in the three-dot menu or in the message details under “Add Recipients”. After clicking on the option, an overlay will open.
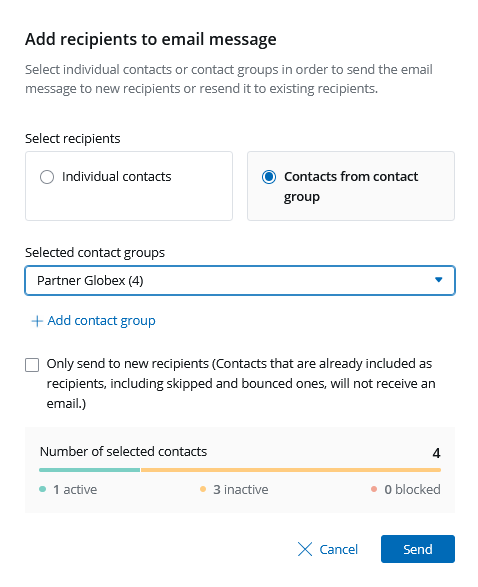
You can add up to ten individual contacts. Here, you have the option to define a CC address for each contact. This can be helpful if the recipient did not receive the original message, because you can in parallel send it to an alternative email address. However, if the original contact was blocked due to a hard bounce, the email will not be sent.
Alternatively, you can add multiple recipients at once via a contact group. With this option, you can choose whether contacts who have already received the message should receive it again or not.
The display of contact quality and the rules for sending are the same when adding recipients later as they are for the original send.
You will also see the subsequent send in the email activities and in the success report. We evaluate according to the following rules:
- If a contact receives the same email message multiple times, we do not differentiate which email the reaction occurred on. In the email activities, you will see a click activity, but not whether the click occurred on the first or second email. In the success report export, the contact remains a single row. In the invitation list and contact details, the email message is simply counted.
- The contact details show always the original sent date of the email message. To check when a specific contact received the email, please refer to the email activities.
- Reactions from CC recipients are interpreted as reactions of the actual contact.
- New contacts are added to the number of contacts and form a new row in the success report export.