Download booking overview and attendee list
You can download your current booking data as an Excel file from your doo Event Manager at any time.
There are two documents available for you to choose from: The list of all bookings with the corresponding booker data and the list with all registered attendees and their data. More information about the difference between booker and participant data as well as instructions on how to create your own questions can be found here.
To download the lists, just open the event details and click on “Manage attendees” or “Manage bookings”.
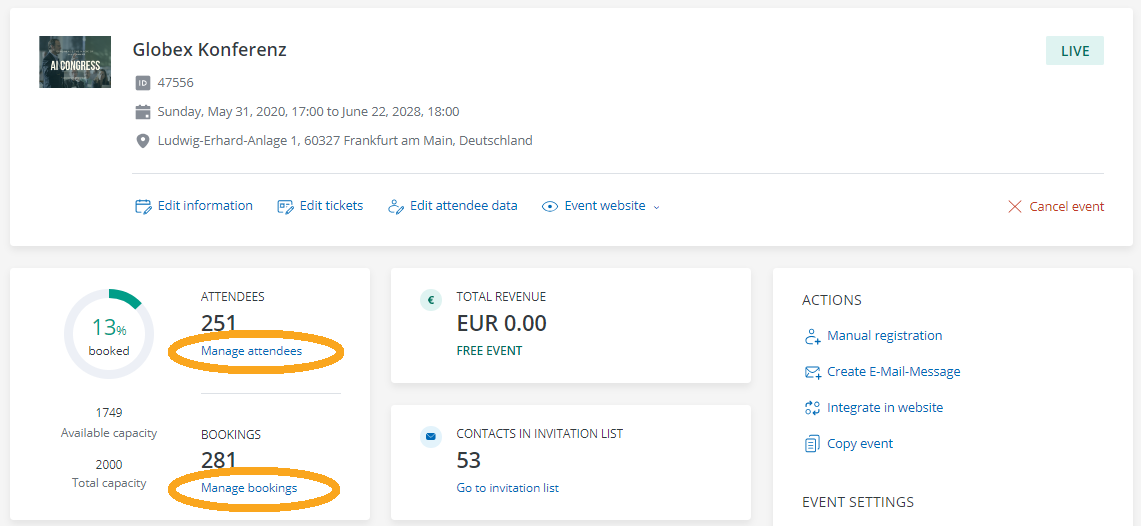
1. Booking overview
If you selected “Manage bookings”, you will see the online booking overview, where you can see all bookings received so far and open each of them individually to view the details. To see all bookings at once including all specified booker data, you can download the list by clicking on “Excel booking overview”.
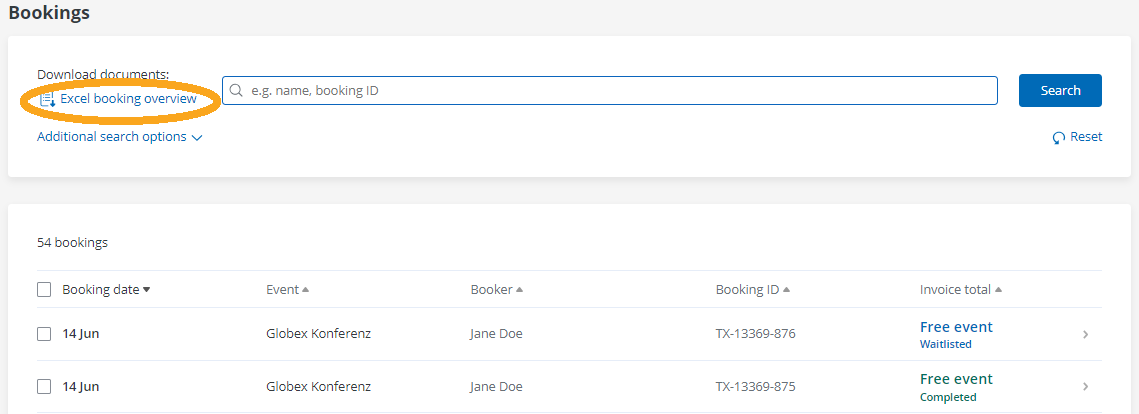
The Excel booking overview lists all the information that was asked on booker level. Thus, one row corresponds to one booking.
Here you will find the invoice information such as the net total, VAT total, invoice number, booking and payment date, booking method (online or manual), cancellation invoice number and any charges, as well as an overview of the tickets purchased for the respective booking and the corresponding revenue. You will also see, if applicable, the additional booking questions and products you defined for the booking form, as well as redeemed codes and their discount. The language used by the booker is also taken into account.
2. Attendee list
If you select “Manage attendees ” in the event details, you’ll access the online attendee overview, which lists all registered attendees. All information about this online overview and its functions can be found here.
You can download the attendee list as an Excel or CSV file by clicking on “Export attendees”.
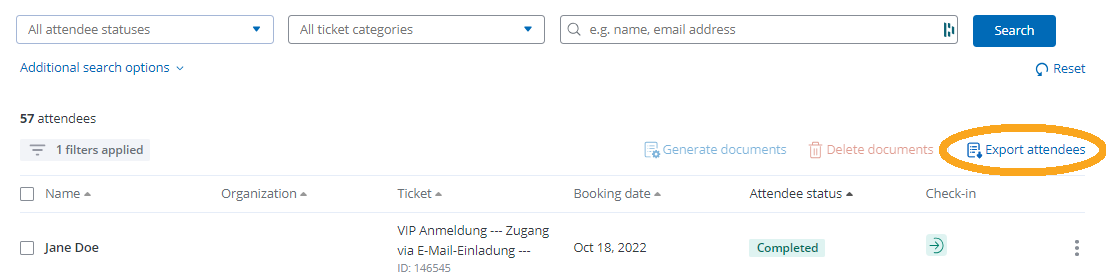
The Excel attendee list is broken down by tickets or rather attendees, i.e. one line in the list corresponds to one booked ticket / attendee . If multiple attendees were registered for a booking, a separate line is created for each attendee accordingly.
The list contains all attendees who successfully booked and were approved to attend your event. Fee-based bookings with manual approval are only added to the list after they reacted to their approval confirmation and selected a payment method to complete their booking.
In the columns marked in green you will find the master data that has been entered on attendee level. If no data has been requested on attendee level, these are empty – the corresponding booking data can be found in the columns highlighted in blue further to the right under “Booking information”. If you have requested additional attendee data during the booking or offered products for attendees, these are displayed in columns highlighted in green to the right of the booker information.
In column B “QR code (URL with ticket ID)” you will find the link of the QR code of the respective ticket. This can be used to check in the attendee on the day of the event. The check-in information subsequently appears in separate columns “Attendee status” and “Check-in date” further to the right. You can find more information about check-in here.