Managing existing contacts
In your doo event manager, you have the possibility to edit and delete existing contacts any time. Information on how to create contacts in doo for the first time can be found here.
1. Edit contacts
1.1 Edit data of a single contact
In order to edit a single contact, call it up in your contact center by entering the email address or the surname in the search field in order to go to the contact details.
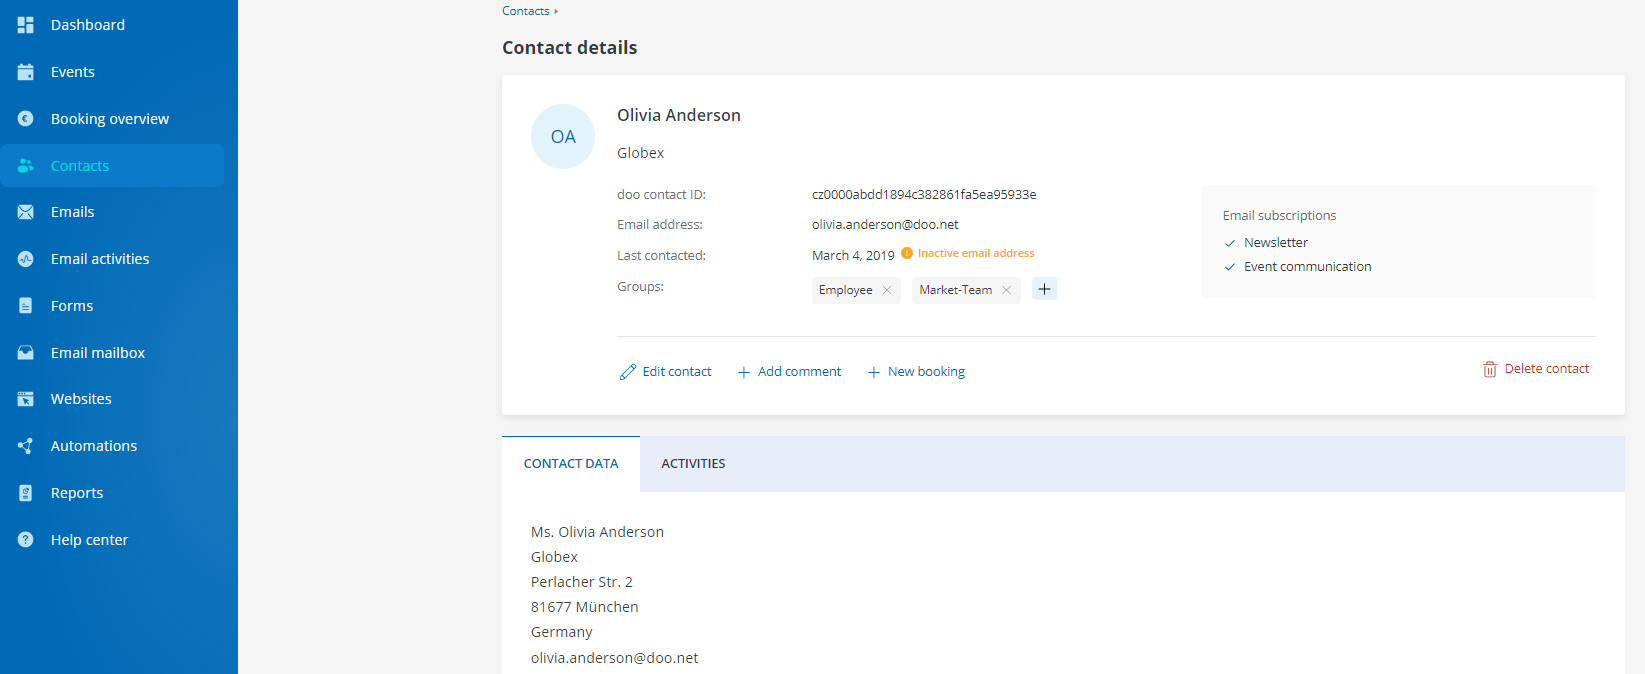
Here you can see at a glance the contact’s master data such as name and email address, the groups they are assigned to, their email subscriptions and the activities this contact has done in the past. You can find all the information about the contact details structure here.
When you click Edit Contact, all the other data fields of the contact will be displayed in the edit mode and you can change them as you wish. If you have changed the email address or External Customer ID to a value that is already assigned to another contact, you will receive a message when you save. If you save the changes anyway, a duplicate will be created for the corresponding value.
Under Groups, you can also manage the contact’s membership to contact groups and assign it to an existing or new group, or remove it from a group.
Under Email subscriptions you can set what type of consent for email marketing you collected for this content. If the checkbox “Event communication” is deactivated, the contact will be skipped as recipient of a doo email message or an event reminder.
If you click on Add comment, you can add any internal comment to the contact. This comment will be displayed in the contact details as well as in the contact export.
Note: To change the association of contacts to bookings or attendees, please go to the booking details. You can find detailed instructions in the article on data synchronization.
1.2 Edit data of more contacts at once
In order to edit more contacts at once, you can use the contact import. All information about this topic you will find here.
2. Delete contacts
Here you can read how to delete contact and which consequences it has.
3. Register a contact manually
To make a booking for an existing contact to one of your events, go to the contact details page and click on “+ Add booking” in the bottom right corner. After you selected the desired event you will be forwarded to the manual registration. The advantage of doing the manual registration through this way is that all contact data will be prefilled in the booking form and the booking will be automatically assigned to the existing contact.
4. Export contacts 

To download all your contacts as a CSV file, click in the contact center under Manage contacts on Export contacts. You can also filter your contacts first. If you then click on the export option, only the filtered contact will be included in your export.
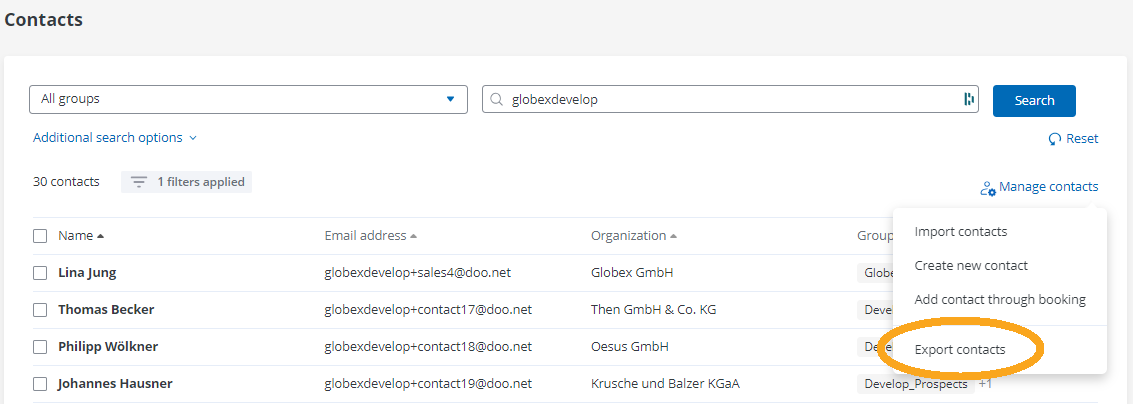
Enter a file name and the desired file encoding. By clicking on “Export” you can start the download of your contact list.