Your first event with doo
Welcome to doo! You’ve already created a doo account and want to set up your first event? In this article we will guide you through your first event creation step-by-step.
1. Creating an event
After logging in to doo, select “New event” on the top right.

The event creation is split up into three steps:
1.1. Event information
Enter all information about your event such as name, address, date, logo and cover image, event contact and description. Be sure to fill out every obligatory field – here you will find a detailed instruction on how to enter and edit event information.
1.2. Tickets
Define if it’s a free or fee-based event, create ticket categories and set the sales period – please read this article for more details on this step.
1.3. Attendee data
Create a registration form that must be filled out by your bookers in the course of the registration. Please consider the difference between attendees (persons that will attend your event) and bookers (persons who makes the booking and might not attend himself). All information about defining attendee data can be found here.
2. Preview
After creating an event, you can preview how the registration process will look like. You can do a test run through the steps of the booking process (1. ticket selection, 2. filling out attendee data and – in case of fee-based events – 3. selection of the payment method). However, you can not complete bookings until the event has gone live.
If you would like to edit the information you can go back to the event edit mode any time by clicking on “Back to editing”. Otherwise, you can proceed to the setting by clicking on “Go to settings” .
3. Event settings
Here you have the opportunity to make further adjustments to your event.
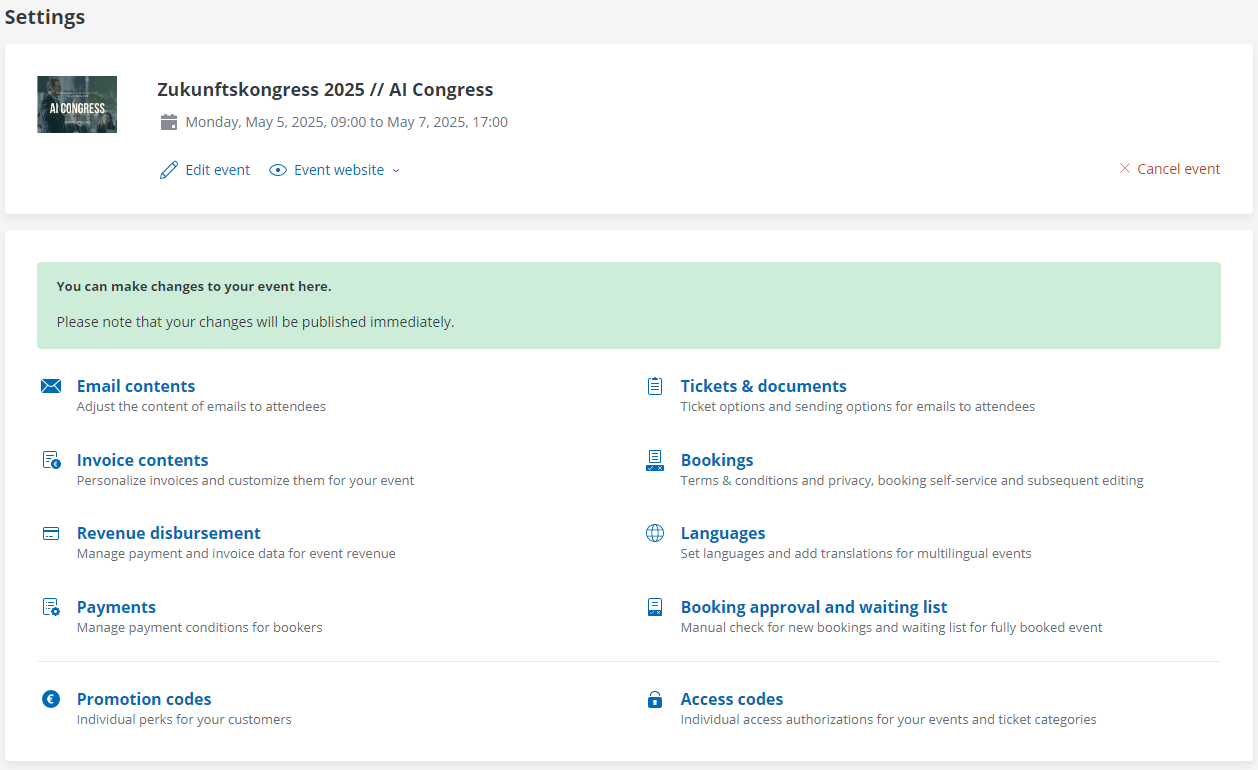
Email contents: Here you can edit the email contents, that are automatically sent out to your bookers as part of the registration. You can find more information here.
Tickets and documents: Here you can set whether tickets should be sent for the respective event, which must then be shown by your attendees at the entrance. Please follow this link to learn how to create your own ticket design. You can also assign a personal document to your event that you attendees should receive, such as training certificates or confirmations of participation. Besides you can upload an attachment, for example directions to your event location that should be send to your bookers after the registration.
Invoice contents: ![]()
![]() Pro and enterprise users who created a fee-based event can adjust some settings regarding the invoices that doo automatically sends out to bookers. Please follow this link for more details.
Pro and enterprise users who created a fee-based event can adjust some settings regarding the invoices that doo automatically sends out to bookers. Please follow this link for more details.
Bookings: In this section you can add your own terms and conditions which will be linked to in the booking process and must be accepted by the booker when registering. Furthermore, you can optionally prohibit double booking by the same booker and activate a self-service booking portal to allow bookers to re-access their booking and download documents on demand.
Revenue disbursement (only for fee-based events):Your fee-based events with doo payment handling can not go live until information for the revenue disbursement has been provided. Please enter your billing address, tax information as well as your bank account information for the payout. You can find more information here.
Languages: If you plan to offer registration options for your event in multiple languages, all entries you made during event creation still need to be translated accordingly. You can find more information about multilingual events in this article.
Payments (only for fee-based events): Settings for payment processing and payment reminders can be managed here. The available options can be managed in the organization management as described here. If you offer bank transfer via doo as a payment method, you can also activate or deactivate regular payment reminders and define the rhythm.
Booking approval and waiting list: You can set a manual booking approval for your event, if you first want to check bookings before you decide if they should be confirmed or denied. Additionally, Enterprise customers can activate a waiting list for your event or just selected ticket categories.
Promotion and access codes: ![]()
![]() For paid for events you can create promotion codes to give attendees a discount on their booking. Using access codes you have the possibility to hide specific (or all) ticket categories of one event on the registration page. Only after entering a valid access code the corresponding ticket category will be displayed and can be booked again. You can finde out how to generate promotion and access codes here.
For paid for events you can create promotion codes to give attendees a discount on their booking. Using access codes you have the possibility to hide specific (or all) ticket categories of one event on the registration page. Only after entering a valid access code the corresponding ticket category will be displayed and can be booked again. You can finde out how to generate promotion and access codes here.
4. Going live with your event
After providing all the required information and adjusting the settings for your event you can start the online registration by clicking on “Go live”. As confirmation an e-mail will be sent to the contact person of the doo organization account.
As of now, it’s possible to register for your event. You can make a test booking to check whether everything is set up correctly. Here you can find more information about test bookings.
5. Publishing and promoting your event
As soon as an event went live, a doo event website will be automatically created, through which attendees will be able to register for the event. You can access this website from the settings page as well as from event detail page.
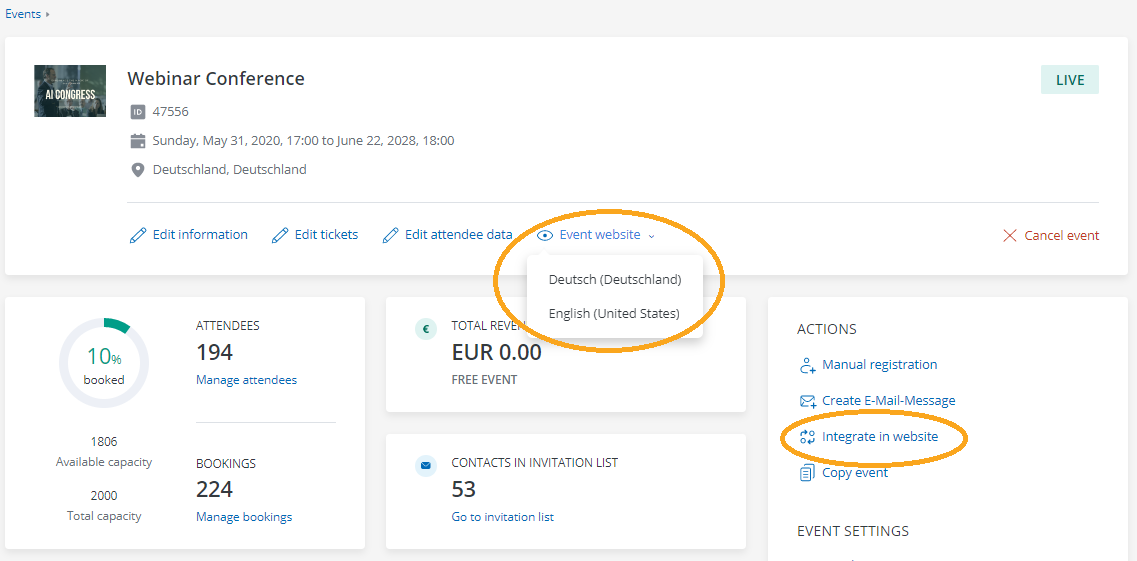
As Pro or Enterprise customer you can also embed the registration form as widget into your own website so that your visitors can sign up for your event without leaving your site. Please read this article for detailed instructions. If you want to offer multilingual registrations, you need to prepare separate landing pages accordingly.
If you don’t have a website for your event yet, you can also create one from scratch in no time using the intuitive doo website editor an a professional template provided by doo. If you are interested in an offer, please feel free to contact your doo contact persons or our Support Team.
Once you have decided which page your attendees should use to register, you can publish the respective URL so that interested persons can sign up.
If you have a list of contacts that you would like to invite to your event, you could inform them about the event via email using the doo email manager and in this way take advantage of a personalized booking process and individual follow-up options. Alternatively, you can of course promote your event on your website, via social media or any other marketing channel.
6. How the online registration works
Here you can read more on what the booking process looks like for your bookers. As described earlier, you can make test bookings at any time to review the process and the associated emails and attachments.
7. Observing and managing incoming bookings
You can view incoming bookings online via the event details and download current booking or attendee lists at any time. For more information, see the article Monitoring incoming bookings.
You can view the data of each individual booking online in doo and still make changes if desired. All instructions on the subject of booker support can be found here.
8. Subsequently edit event information and settings
You can still edit your event even after it has gone live. Via the event details you can call up the individual steps of the event creation as well as navigate to the individual settings via the right menu. There are a few settings that cannot be easily changed after an event has gone live: Learn about the specifics of changing the price or sales period of your tickets here.
9. Bookings with outstanding payment
Bookers who have booked with the doo payment method “purchase on account” and have not paid yet, will regularly receive automatic payment reminders from doo – even beyond the end of the event. You can stop these at any time by cancelling the respective bookings in the system. All information on how to deal with unpaid bookings can be found here.
10. Day of the event: Attendee list and check-in
If you have activated the send-out tickets for your event, you can scan the QR codes on the tickets at the entrance to check them for validity and invalidate them. Tips for a smooth admission process for your attendees can be found here.
11. Payout
In case of payment processing via doo, the received participant payments will be forwarded to you in a monthly rhythm – the final invoice will then be issued in the following month after the end of an event. You can find all information about our payment process here.
12. Creating event templates
Should you prefer not to create your events from scratch every time, it’s possible to create event templates. You can find more information about this here.
If you have any questions about individual features of doo, you are welcome to browse our help center or contact our Support Team.
We’re looking forward to working with you and wish you success with your events!