Creating and managing contact groups
You can organize your contacts in groups at doo. Groups help you manage your contacts. You can use contact groups in different places, among others
- as recipient lists for email messages
- for the personalization of codes
- for targeted data exports of a subset of contacts
- for creating invitation lists for your events
- for personalized booking paths for specific attendee groups
You can create contact groups as you wish and add existing contacts to groups or remove them from existing groups based on different criteria. For example, would you like to reinvite the recipients of an email message who have not yet RSVPed to your invitation? Or do you want to send further information about your event to all bookers who have already registered? Or do you need a list of all contacts who gave a specific answer to an attendee question? Below you will find instructions on how best to proceed in these cases. You will learn
- How to create contact groups.
- How to assign a contact to a group or remove them from a group.
- How to assign multiple contacts that meet certain criteria to a group or remove them from a group.
- How to view, rename and delete a contact group.
1. Create new contact group
You can create new contact groups directly during contact import or manual creation of new contacts. Alternatively, you also have the option to create a new group in the contact center by clicking on the “Create new group” option.
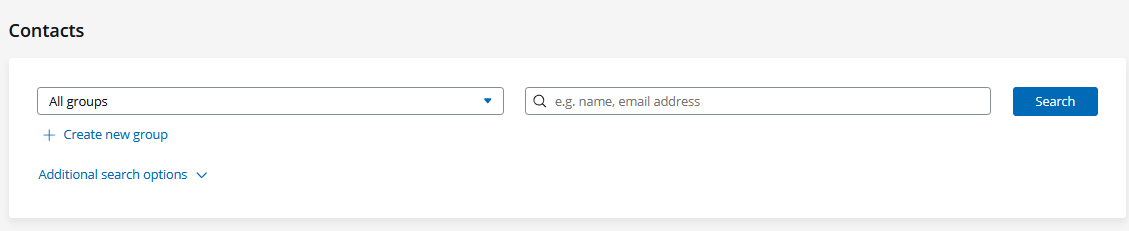
In the pop-up, you can assign the desired group name and confirm.
In the next step, you can then add contacts to the group by either importing them into doo (everything about contact upload can be found here) or by selecting single or multiple contacts that already exist in doo and assigning them to the group (see below).
2. Adding or removing individual contacts to/from a group
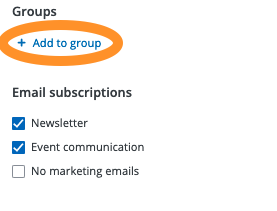
In the contact details you can add a contact to existing groups or remove it from groups. To assign the contact to a new or existing group, click on “+” and select the corresponding group from the dropdown. To remove the contact from a group, click on the “x” behind the respective group name. Alternatively, click on “Edit Contact” and scroll down to “Groups” to manage the group assignment.
When creating a contact, the assignment works analogously. In both cases, don’t forget to save your changes. For more information on editing contact data, click here.
When importing contacts, you have to choose at least one group to which you want to add all imported contacts.
Alternatively, you can also manage the group assignment of a single contact in the same way as described for multiple contacts in the following section.
3. Assign multiple contacts to groups based on specific criteria
If you want to assign multiple contacts to a new or existing group or remove them from it at the same time, you do not need to use the contact import, but you can achieve this directly in your doo contact center and further overviews.
3.1 Organize contact groups based on data field contents
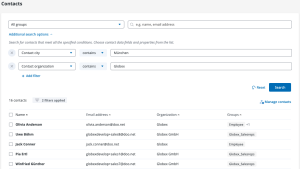
You want to create a group of contacts that have specific contact data, for example all contacts from a specific country, all contacts interested in a specific topic or all members? If you want to filter the contacts in your contact center by specific content, you can do that using the filter function which you can find under “Additional search options“.
In addition to the contact master data such as name, organization, address and so on, as well as the stored data in contact fields you have created, you can also filter by other information such as the quality of the email address or group assignment. There is also an option to search for all contacts for no information for certain fields has been provided so far.
You can specify several filter conditions at the same time, for example, to filter contacts by city and organization. If multiple conditions are specified, only the results that meet all conditions will be displayed (search operator “and”).
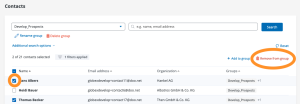
After you have filtered your contacts as desired, you can select individual or all filtered contacts using the checkbox and add them to or remove them from a group.
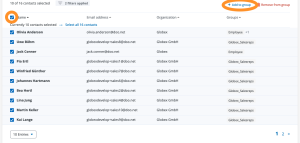
If your overview has several pages, you can select all contacts of the following pages by clicking on “Select all contacts” in the green box.
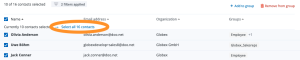
Then use the mass actions above the table to assign the ticked contacts to a group or remove them from a group.
3.2. Create a contact group from bookers of an event
You can create a new contact group from the bookers of an event with just a few clicks, to then select them as recipients of an email message, for example. This is useful, if you want to contact all bookers of an event to inform them about changes, to send them additional information or to inform them about the cancellation of the event.
To do this, call up the event in your doo Event Manager and go to “Manage bookings” to call up the list of all bookings received. If desired, you can use “More search options” to filter the bookings, e.g. to display only the active and paid bookings and thus exclude the cancelled or still unpaid bookings.
If you then click on the checkbox on top of the first column of the list, all bookings displayed on the current page will be selected. If your overview has several pages, you can select all contacts of the following pages by clicking on “Select all bookings” in the green box. Afterwards, the selected contacts be added to to an existing or new group or removed from an existing group via the corresponding bulk action above the list. The latter is useful, for example, if you want to send an invitation reminder and remove the already registered bookers from the recipient list of the first invitation mailing.

3.3. Create contact groups from attendees of an event
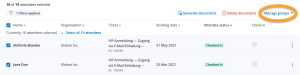
You can also easily create groups from the attendees of an event, for example to select them as recipients of an email message or to give them access to a specific ticket category that is reserved for returners. To do this, go to the “Attendees” item in the event details.
As with contacts and bookings, there are also various options for filtering your attendees. At the top level, you can filter by attendee status as well as the desired ticket category.
With the filters under “Additional search options” you can narrow down your search results even further to see exactly the type of attendee you are looking for. Among other things, you have the option to filter by the various personal data (name, organization, country, etc.) of the attendee or booker, by the answers given to any questions you may have asked, or additionally booked products. It is also possible to search for bookings where a file has (not yet) been uploaded, in case you need documents such as a student ID or press card from your attendees.

As soon as you have found the desired attendees via the set filters, you can select them via mass selection (checkbox in the first column) and then add them to a new or existing group or remove them from an existing one by using the bulk actions.
3.4. Build contact groups based on email activities
If you use the doo Email Manager for your invitation mailing, you can compile individual recipient lists for follow-up campaigns based on the email activities with just a few clicks. Depending on the criteria you want to use to send your message, you need to filter the activities accordingly or update groups using the booking or attendee overviews.
3.4.1. Invitation reminder to all contacts who have not yet responded to the first invitation
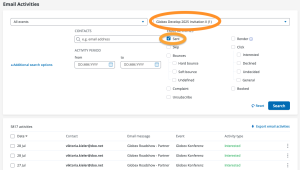
- Open the email activities.
- Filter the activities for the respective email message you used to invite as well as the activity “Sent” from the “Additional search options“.
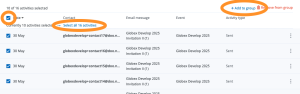
- Now mark all contacts to whom the message was sent and add them to a new contact group (e.g. name it “Reminder group EN” with the event name).
- Next, use the “Additional search options” to filter by the desired activity on the basis of which the reminder group is to be formed:
- To write to all contacts who receive the email but have not yet booked, select all “Booked” activities to then remove them from the Reminder Group.
- To write to all contacts who have not yet responded to your invitation, i.e. have neither booked nor clicked, select all “Booked” and all “Clicked” activities and remove them from the reminder group.
- To write to all contacts who have clicked on the registration link but not booked, select all “Booked” and all “Interested” activities and add them to the reminder group. Then call up the “Booked” activities of the event again and remove the bookers from the group. In this way, you ensure that only the interested parties who have not yet booked in are included in your reminder group.
- If you have received manual rejection to your invitation in another way (e.g. by separate mail or phone), you can easily remove them manually from the reminder group. To do this, simply call up the group under “Contacts“, select the desired contact and click on “Remove from group“.
- To ensure that all persons who have already registered, i.e. also any manual registrations as well as bookings that were not made directly via the email invitation link, are really removed from the reminder group, go to the respective event, choose “Manage bookings” and there in the booking overview select all bookers and also remove these from the reminder group (see point 3.2.). If you have also queried the email address on the attendee level, proceed in the same way with the attendee overview (see point 3.3.).
- After you have set up the email message for the invitation reminder, select the reminder group as the recipients so that only these contacts are contacted again.
4. View, rename and delete a contact group
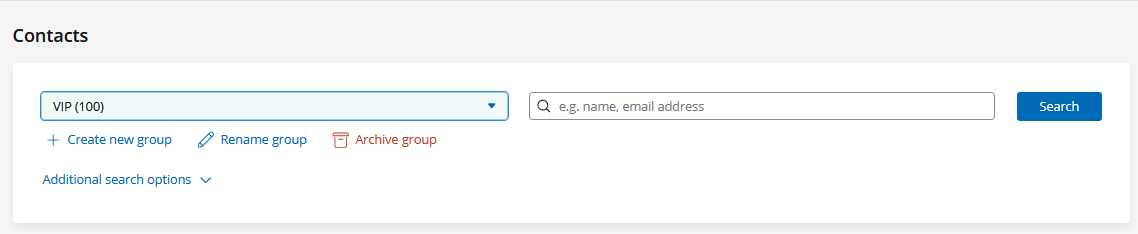
To view the contacts withing a contact group, go to the Contact Center and select the group from the dropdown in the quick filters. Then click on “Search”. The system will show you all contacts in this group. You will also see the option to rename or delete respectively archive the group. Just click on the desired action and confirm it.
When deleting a group, you will not delete the contacts that where assigned to this group. Those remain in the Contact Center and will only be removed from the group. Deleting a group cannot be undone.
For groups that are used as attendee group or recipient groups, deleting is not possible. Instead you will see the option to archive the group. By archiving, you will no longer see the group in the group selection dropdown or the contact export.