Attendee tickets and QR code scanning
You can automatically send tickets to your booker & attendees via doo if you want to use tickets for admission control on-site at the event. The settings for this can be found in the event details in the right-hand menu “Event settings” when you select “Tickets & documents”.
1. Activating attendee tickets
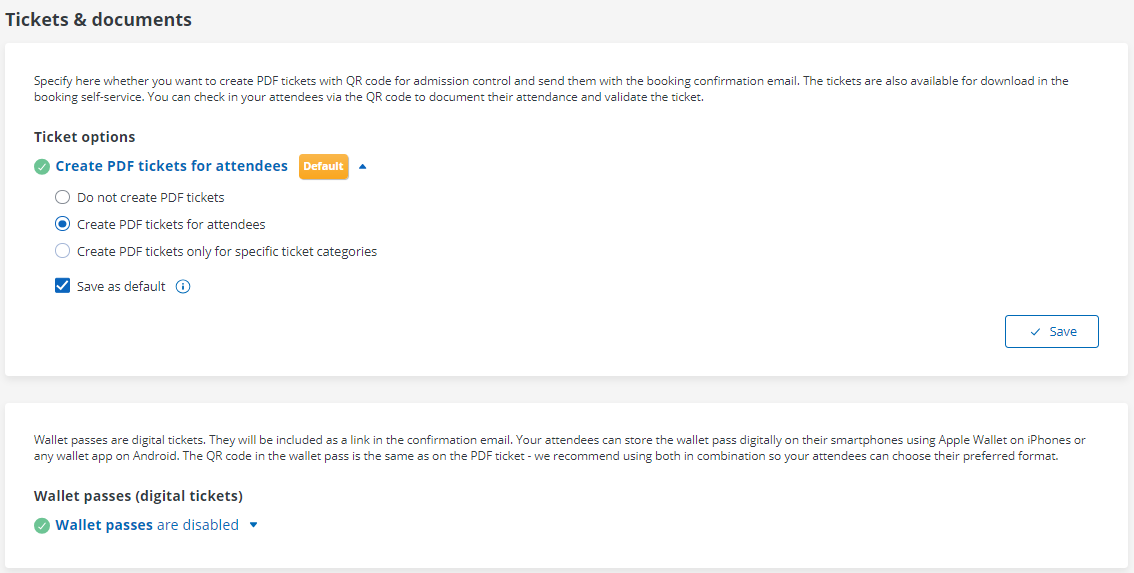
1.1. PDF Tickets
Under “Ticket Optionss” you can determine whether or not your bookers should receive PDF tickets after their successful booking.
By default this function is activated for new events. However, you can change this by selecting “Do not create PDF tickets”. If desired, you can also save these settings as default for future events by checking the corresponding checkbox.
In addition, you have the option to specify that tickets should only be created and sent for certain ticket categories. In this case, select one or more categories and save the settings.
1.2. Wallet Passes
In addition to the PDF tickets, doo also offers the option of displaying a link in the booking confirmation email, which the booker can use to save the ticket in his wallet. You can activate and deactivate this function in the corresponding section. If you want to use the function, we recommend that you upload your own logo (in different sizes) in the next step, so that your attendees can easily find the ticket in their Wallet. If you wish, you can also set your own string for the QR code if you need this for your check-in system. Otherwise, the QR code corresponds to the link of the PDF ticket, which leads to the doo check-in page.
2. Ticket design
If no individual ticket design is included in your doo package, the doo standard ticket design will be used for your event. The ticket is sent as PDF file in upright in DinA4 format and is attached to your booking confirmation emails. In addition to general information about the booking and event, your logo and the event address and the individual QR code for the checkin is printed on the doo standard ticket. Here you can see exactly what the doo standard ticket looks like.
As alternative to the doo standard ticket, we also offer individual ticket designs that can be created according to your corporate design requirements and, for example, can be folded and used as name tags at the event. All information about individual ticket designs at doo can be found here.
3. Sendout of the tickets
If you have activated tickets for your event, bookers will receive the tickets together with the booking confirmation email after successful booking – or after receipt of payment in the case of paid events. If the automatic event reminder is activated for your doo account, your bookers will also receive an e-mail reminder with the tickets attached four days before the event starts.
The tickets are also available for download in the respective booking portal for your bookers.
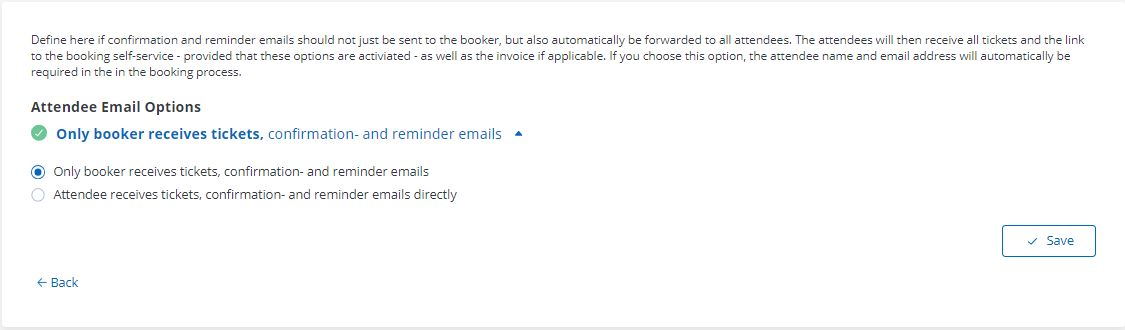
In addition, you can set below in the settings for “Tickets & Documents” under “Attendee Email Options” that the tickets are not only sent to the booker or also to the attendees. If ticket sending to attendees is activated, the name as well as the email address will automatically become a mandatory field on the attendee level, so it must be entered for each individual attendee when booking. The booking confirmation email to the booker is then also sent to the attendees registered during the booking like a blind copy – accordingly it contains the tickets of all attendees, not just the individual ticket of the respective attendee. Sending each attendee only his own ticket is not possible with this function, but can be implemented with the help of the doo automation function. If you are interested, please contact your doo contact person or our Support Team.
4. Scanning the QR Codes at the entrance
At the entrance, each attendee should show his ticket on his smartphone or printed on paper. The QR codes on the tickets can be scanned at the event using any QR code scanner via smartphones or tablets, which will direct you to a check-in page displaying the attendee details and allowing you to check the person in with one click. Please note that the check-in function will not be activated until 24 hours before the start of the event and can only be tested then.
If a scanned ticket is valid and the attendee is successfully checked in, you will be shown a check-in confirmation page. If desired, this page can be customized for you so that it can be used as a template for printing name badges on-site, for example, or to display specific information about the attendee. Customized templates are available as an additional service. If you are interested, please contact your doo contact person or upgrade@doo.net. Your individual template will then be created according to your requirements and stored for you in the settings “Tickets and documents” under “Template for check-in confirmation page”.
The ticket is automatically devalued by scanning and cannot be used again. If a ticket that has already been devalued is scanned in again, a corresponding error message is displayed and the attendee cannot be checked in.
Devalued tickets are listed as “Checked in” in the online attendee overview and the attendee list you can download. That way you can check at any time during or after your event which people are/were there and when exactly they checked in.
If an attendee has forgotten his ticket, you can also call him up via the online attendee overview and check him in manually. All information about the functions of the online attendee overview can be found here.
We have compiled detailed instructions and further tips for smooth admission for you here.
At the event each attendee should show his ticket either on his smartphone or printed out on paper. The QR codes that are displayed on each ticket can be scanned by your on-site team with any QR code scan app via smartphones or tablets. You will be redirected to the doo check-in page, on which the attendee’s data is displayed and you can check in the person with one more click. The ticket is then automatically validated and cannot be used again. The check-in option is only activated 24 hours before the event starts.
Validated tickets will be listed as “Checked in” in the Excel attendee list and the online attendee overview. That way you can monitor at any time during and after your event who actually attended.
If an attendee forgot to bring his ticket, you can also access his booking via the online attendee overview and check him in manually. Here you can find all the information about the online attendee overview.
We have collected detailed instructions and tips for a smooth on-site process in this article.