Contact import – Bulk creation and editing of contacts
![]()
![]()
To create or edit a larger amount of contacts, you can use the contact import. Here you import the data from a CSV file to doo. In the following we will show you how the contact import works and what you should pay attention to.
1. Prepare the CSV file
As a Pro and Enterprise customer, you can upload contact lists from your computer to your doo Event Manager as a CSV file.
The CSV file must be comma-separated (separator “,”) and use either UTF-8 (recommended) or ISO 8859-1 as encoding. If you are exporting the data from a third party system, they usually have the option to choose CSV format for the export. If you have the data in another format, you can create a CSV file using a spreadsheet program, for example Microsoft Excel, Google Sheets or Apple Numbers. If you need a template with the existing system fields, you can download it in the import process or from this link.
The following requirements must be met by the data in your CSV file for a successful import:
- You can find an overview of all system data fields and the default values as well as the requirements for custom contact data fields depending on the data type here.
- For country you can use the country code (for example “DE”) or the spelled out name (for example “Germany”). The latter must match the spelling used in doo. We recommend the import by country code.
- For selection fields, the values are case-sensitive and must correspond exactly to the values stored in the system.
- You can also use the import process to create new contact fields or import values for selection fields. You can find more information here.
- If you want to write to the contacts with the doo Email Manager and you have the appropriate consent from the people to do so, you also need to import the email subscriptions. In order to do so, include a column for “Email subscription event communication” that contains a “1” as value for each contact that you have the permission to contact.
- The values in the cells must not contain commas.
2. Contact import in doo
2.1. Start the import
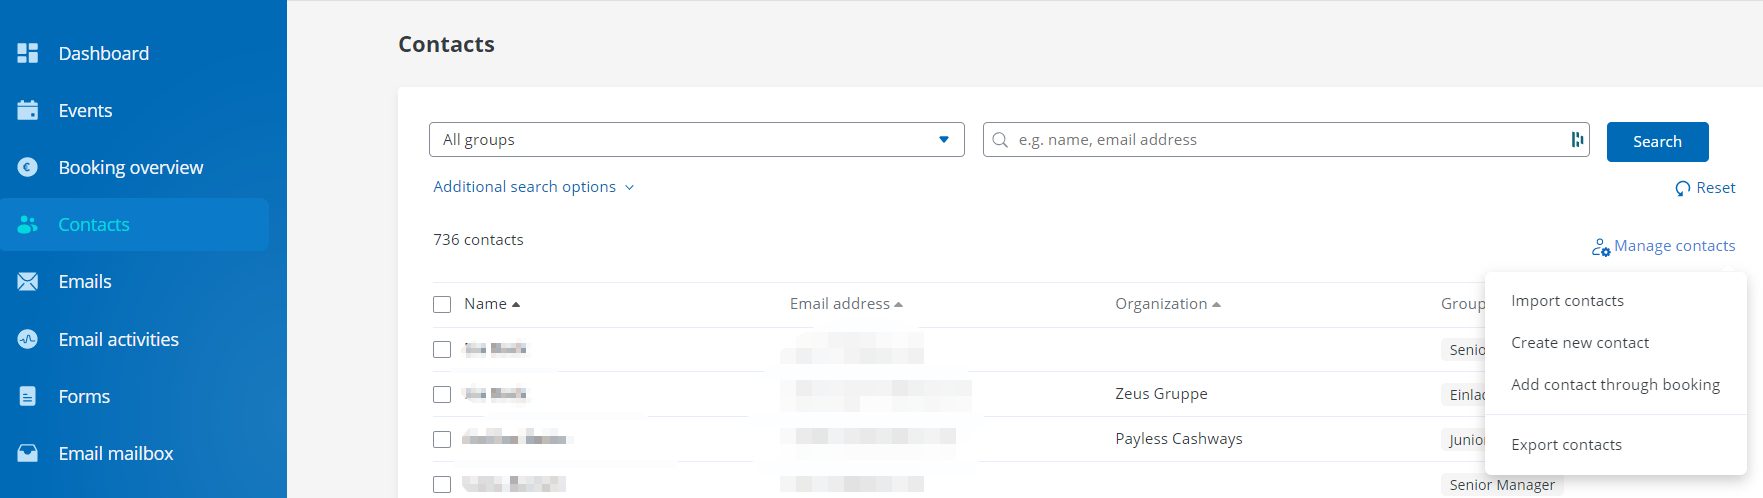
Go to the contact center via the general menu item “Contacts“. Under “Manage contacts” start the import process via the item “Import contacts“.
2.2 Select the file
Upload your CSV file from your computer and select the appropriate encoding (see above).
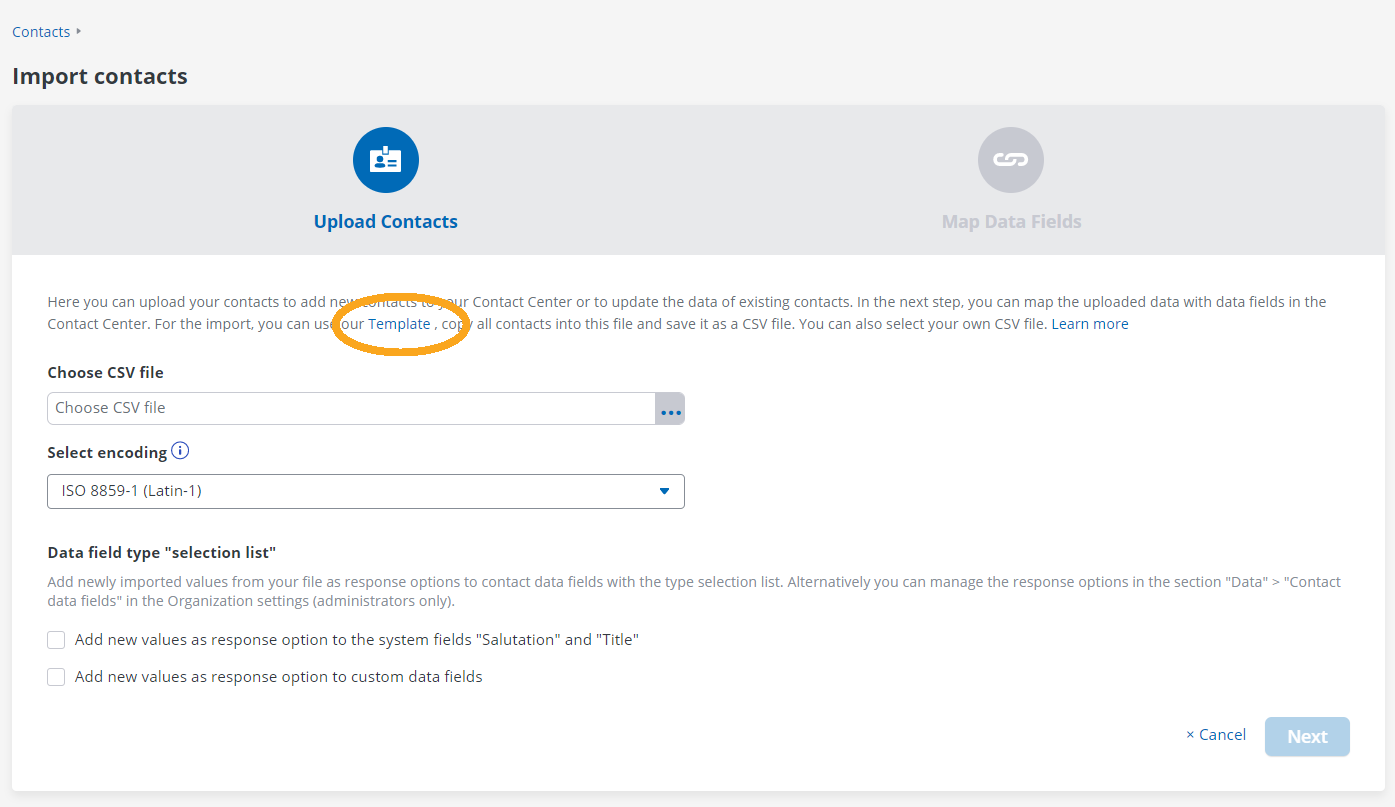
If you want to use the import process to add additional response options for the system fields “Salutation” and “Title” or for your custom contact data fields of the type selection list, activate the corresponding option. You can also store the values manually in the organization settings. Find more information about this here.
Click on “Next” to proceed to the next step.
2.3. Identification of contacts
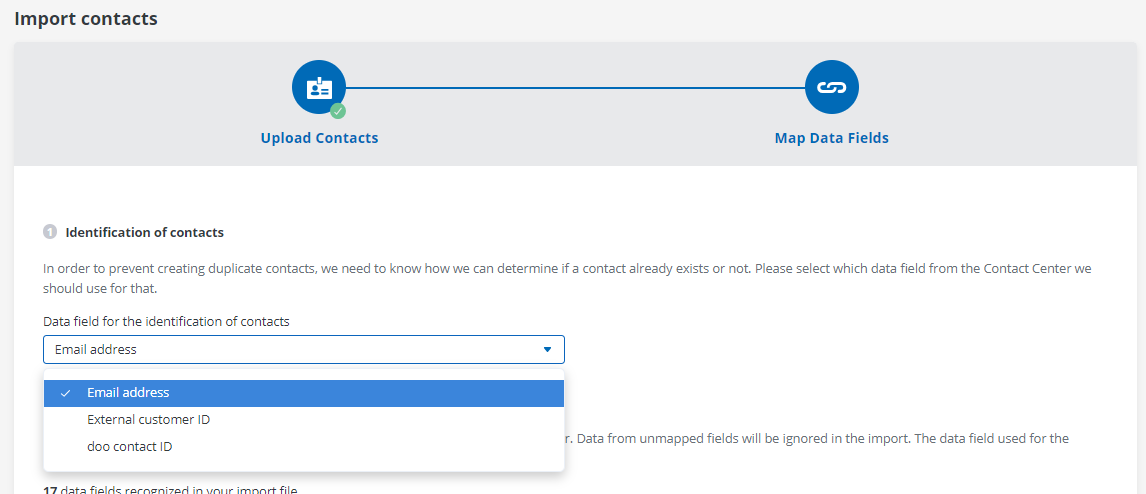
In the next step you can select the identifier for your contacts. With this you define which data field is used to check if a contact already exists in doo and should be updated or if a new contact should be created.
You can use the contact import to create new contacts and to update the data of existing contacts.
2.3.1. Email address
By default, the email address serves as an identifier for doo contacts. If you select this option, the system will check if a contact with the email address already exists during the import. If yes, the contact will be updated depending on duplicate settings (see below). Otherwise a new contact will be created. This also applies if there are multiple contacts with this email address in doo.
Use cases: This option is useful for contact lists where each contact has an email address and no email address is duplicated.
If you want to create contacts without an email address, or several contacts have the same email address, choose one of the following identifiers.
2.3.2. External customer ID
You can also enter your contacts into doo using your own identifier, the “External customer ID”. In this case, you assign the values for the identifier independently of doo. If you use this option, be sure to ensure that each contact has a unique value that is not assigned to any other contact.
Use cases: This option is recommended if the contacts come from another system, such as a CRM or customer database, and already have a system ID or customer number there that you also want to store in doo. The external customer ID also offers a solution for cases where you want to create contacts without email addresses or multiple contacts with the same email address.
2.3.3 doo contact ID
If you want to re-import a list that you have previously exported from doo to update the records of already existing contacts, you can use the doo contact ID. Your CSV file must contain a column with the doo contact ID accordingly.
Use cases: Uploading via the doo contact ID is useful if no new contacts are to be created in doo, but existing contacts in doo are to be updated.
2.4 Mapping the data fields
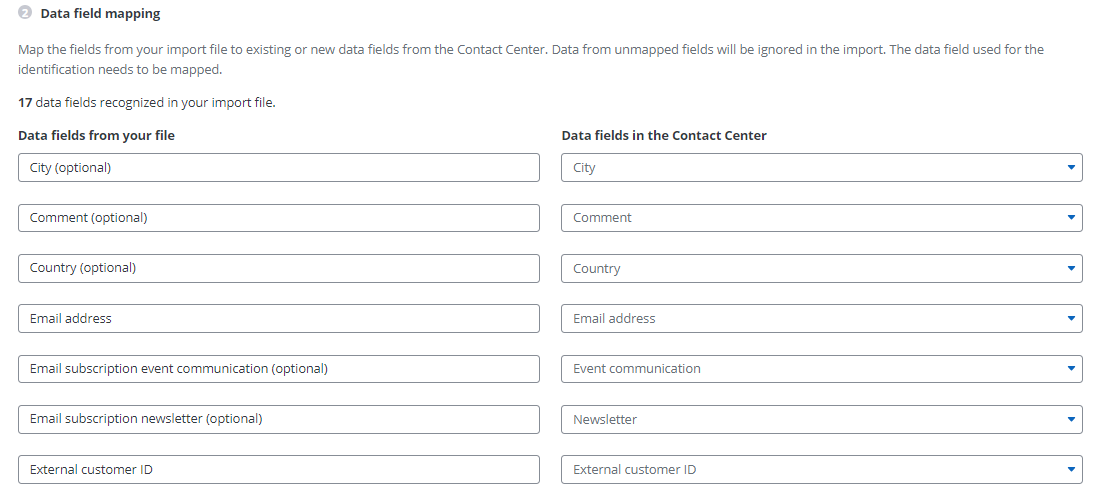
Next you can map the data fields from your CSV file to the doo contact data fields, so that after the import the data ends up in the correct fields. In the left column you can see an overview of all data fields the system found in your CSV file. In the right column you can see the doo contact data field where the respective data from your file will be inserted. Depending on the name of the columns, the system will automatically map some fields. You can correct this mapping at any time and manually map unassigned fields. If you do not map a column from your file to a doo contact data field, the data from that column will not be imported. It is important that the field you selected above as identifier is mapped to a field from your file.
2.5. Choosing the contact group
Under “Select group” you can decide whether the contacts should be added to an existing group or a new group should be created. You can find more information about contact groups here.
2.6. Handling duplicates
Afterwards you define how duplicates should be handled. This setting only affects contacts for which the identifier you have defined already exists in the doo contact center. If no contact exists in doo yet for the identifier of a record, a new contact with all data of the assigned data fields will be created during the import.
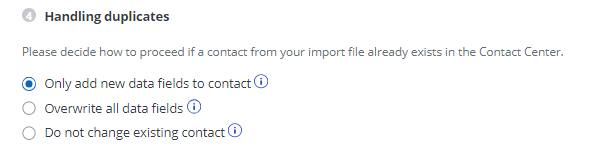
For handling duplicate, you can select between three options:
- Only add new data fields to contact: Select this option if you want to use the import to create a new custom contact data field and add only this data field to existing contacts. This option is available only to administrators in enterprise organizations.
- Overwrite all data fields: Use this option if you want to update existing contacts. All data fields that you have mapped from your import file will be overwritten for existing contacts. If a value in the import file is empty, an existing value on the contact will not be changed. If you do not want to update certain data fields, simply do not map them.
- Do not change existing contact: Select this option if you only want to add new contacts from the file and do not want to update existing contacts.
2.7. Processing the import
After you are done with all settings, you can start the import by clicking “Import contacts“. You will be redirected back to the contact overview. Depending on the number of contacts to be imported, it may take a few minutes for them to show up in your contact center. After the successful import, you will receive a notification by email. If contacts from your list were not successfully imported, you can see from the CSV file sent along which contacts are affected and what the reason for the failed import was. You can go through the import process again with a CSV file containing only the affected and corrected records. Alternatively, edit the contacts individually or create them manually.
All newly created as well as updated contacts can be found in the Contact Center as usual. You can filter by the contact group to view the selection.
Hier ist die Übersetzung ins Englische:
2.8. After the Import
You will receive an email with the evaluation after the import.
Under the section “Records not processed,” the number of records for which the import was unsuccessful will be listed. Further information can be found in the import log file (note that this can only be downloaded a few hours after the import).
In the “Error Type” column, you will find the reason for the failed import:
- Identifier: Duplicate: More than one contact with the identifier used in the import (e.g., email address) exists in doo. Therefore, a unique assignment of the record is not possible. Solutions: a) Remove the duplicate from the doo contact center and restart the upload, b) Edit one of the two contacts in doo, or c) Use a different identifier (e.g., external customer ID).
- Identifier missing: The identifier specified for the upload in doo was not provided in the upload file. Solution: Add the identifier to the upload file and restart the upload.
- Email: Incorrect Email Address: The provided email has an invalid syntax (e.g., no @ symbol, invalid domain).
- Data size exceeds field limit: The maximum character limit has been exceeded, meaning the imported value is too long.
- Data is insecure: Potentially harmful content was found in the value, making the import not permissible.
- Undefined salutation/Undefined title/Data is incorrect: The uploaded value for a selection field such as salutation or title does not exist (also pay attention to the language).
- Inconsistent email subscriptions: “No marketing emails” and “Event communication” or “Newsletter” are both set to TRUE.
- Doo Contact ID: invalid value: The record contains a non-existent doo contact ID.
- Other erroneous content: An unexpected error has occurred.