-
General information
-
Account Settings
- Creating & managing your personal doo account
- Organization settings: Managing your account settings
- Multi-user: Working as a team
- How to reset your password
- Changing the email address of your doo account
- The doo account packages
- What can I do if a doo site does not load
- Adjusting standard labels and texts of the doo booking process
- How do I delete my account
- Payment Process: How to manage payment options
- Password Security using doo: What options are available?
-
Events
-
- Edit email contents
- Using placeholders in booking email templates
- How to adjust invoice contents
- Attendee tickets and QR code scanning
- What do doo tickets look like?
- E-mail attachments for bookers and attendee
- Certificates & Co: Create custom documents
- Define your own booking conditions
- Revenue Disbursement: Entering and editing invoice address & bank account information
- Create bilingual (multilingual) events
- Bookings with manual approval
- Create a waiting list
- Access codes and promotion codes: Discounted tickets for your participants
- doo Widgets: Integration into your own website
- doo Default Event Website and Custom Event Website
- How to create a booking process in english
- Providing flyers, event programs or direction sketches
- How does the booking process work for my attendees?
- How do I make test bookings?
- Creating exclusive registration access for selected contacts
- Delete ticket categories & change prices and sales periods after go-live
- Cancellation of events
- What are event fields and how do I use them best ?
- Shorten the booking process and prefill data: How to make the booking process as convenient as possible for bookers
- Tips for virtual events with doo
- Integration into your own Facebook page
- Event Templates: Creating templates for your events
-
Manage Bookings
- Manage bookings and attendees
- Monitoring incoming bookings
- The attendee overview
- Invitation list: Track the registration status of specific contacts
- Manual registration
- Resend automatically generated emails
- Rebooking: How to change existing bookings
- Cancellation & Refund Handling
- Booking self-service: Allow bookers to subsequently access and edit their bookings
- Download booking overview and attendee list
- Change of attendee data and invoice address
- Bank transfer: How to deal with pending transactions
- What to do, if someone has not received their confirmation e-mail or ticket
-
Contact Management
- Contacts: Introduction and Topic Overview
- Contact details: Collect cross-event contact information
- Overview contact data fields
- Managing contact data fields
- Creating contacts - How do contacts get into the doo contact center?
- Contact import - Bulk creation and editing of contacts
- Managing existing contacts
- Creating and managing contact groups
- Datamatching & Synchronization of booking data and doo contact
- Email subscriptions: Double opt-in & opt-out options at doo
- Deleting contacts
-
Emails
-
Websites
- The doo website editor: create an individual event page
- Mobile optimization: Customize your site for all your devices
- Installing different tracking tools on the website
- Creating a SSL certificat (HTTPS) to ensure data security
- Website Tracking: How to integrate doo into your Google Analytics To be Created
-
Additional Functions
- Optional Service: Refund handling via doo
- Ticket design: How to get your ticket in the desired design
- Forms - Set up surveys and feedback requests for your attendees
- Embedded Reports
- Customer specific sender emails
- Email inbox: How to manage email requests from your participants within doo
- Add calendar entries to your event communication
- Filtered cross-event widgets: How to show only selected events
- Widgets and Accessibility
-
Automations
-
Booker & Attendee FAQ
-
On-Site and Attendance
Designing Emails with the doo Email Editor
Create great HTML emails without programming knowledge! With the doo Email Editor, you can design and customize the content of your email messages and auto-emails using drag-and-drop.
1. Set the basic structure of your email
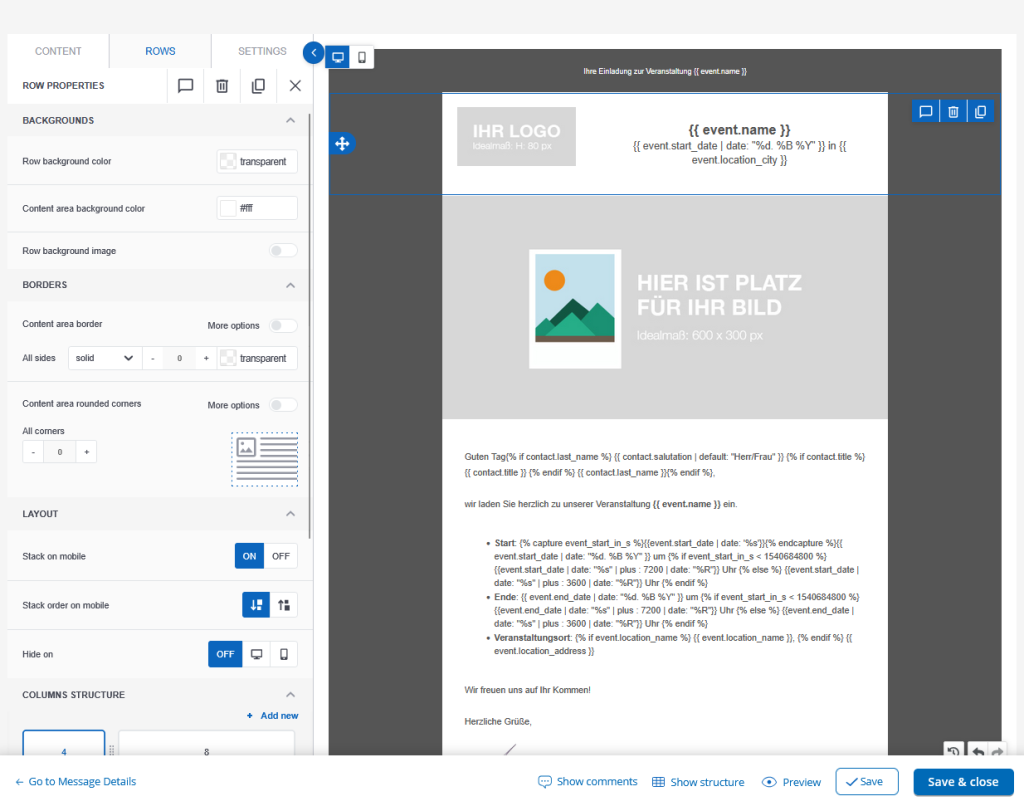
The doo Email Editor structures messages into individual rows, where content elements can be inserted. Rows extend across the entire width of the email, including the background. Each row can have one or more columns. You can visualize the structure of an email at any time using the corresponding function in the footer.
Within a column, content can be inserted. Content consists of individual elements such as a text block, a heading, a button, or an image. A column can contain one or more pieces of content.
For each piece of content, each column, and each row, you have various settings to define, for example, background color or padding. You can move content via drag-and-drop, as well as rearrange columns and rows. Additionally, you can copy or delete individual pieces of content, columns, or rows, including their content, at any time.
Some basic configurations can also be stored in the “Settings” tab. If you use these settings for your rows, columns, and content without overwriting them, it will allow you to make quicker adjustments afterward or when reusing the email by copying it.
If you use a template for your email or copy an existing email, the basic structure is already in place, and you can focus on adjusting the content, such as text and images, as needed.

2. Edit content
By clicking on a row, column, or content element, you open the settings for the respective block.
Here are some basic tips on customization options in email design:
- Background colors: Each block has its own background color, and the individual blocks are essentially layered on top of each other. This means the background of a content element like a text block is on top, followed by the background color of the column, the row, the general background color of the email content, and finally the general background color of the email. Our recommendation is to set the desired color at the lowest possible level (i.e., via the Setting tab) and use a transparent background for content above it that should not have a different color. This way, you can make color changes quickly later on.
- Layout and spacing: Content, columns, and rows each have padding (inner spacing) and some also have a border. For creating horizontal space between two blocks, there is also a dedicated content element “Spacer”. We recommend controlling spacing through these options rather than using blank lines in the text.
- Text: For text elements, an additional floating menu opens where you can find common text settings such as font style, alignment, size, or linking.
- Images: Using the “Change Image” button, you can upload images or select from your already uploaded images. You also have the option to edit images directly in the program.
- We generally recommend ensuring that images are not too large. Large emails increase the likelihood of being marked as spam or blocked. Additionally, the larger the image content, the longer it takes to load the email. This can be particularly annoying on mobile devices with limited data volume if emails load slowly and consume a lot of data.
- Always provide an alternative text for images, which is displayed when email programs block image loading.
- Social: Using the “Social” content element, you can quickly add an icon bar with links to your social media profiles.
You can undo or redo your editing steps at any time using the buttons in the lower right corner.
2.1. Merge Tags
With merge tags, you can address your contacts, bookers, or attendees by name and use the available data to personalize the content in your emails.
Additionally, merge tags allow you to use an email as a template for different events without having to adjust the text content separately each time. Event-specific data such as event name or date will be automatically displayed. This is also valuable if there is an update for any value, since at the moment of sending, the system will always use the current data. So you cannot forget to update say the event location in your email text if you are using merge tags.
Depending on the email type and level of personalization, different merge tags are available. You can recognize the placeholders by the double curly brackets, for example, {{ contact.first_name }}. In general, the following data sets are available in doo:
- Organization
- Event
- Contact
- Booking
- Attendee
- Code (promotion or access code)
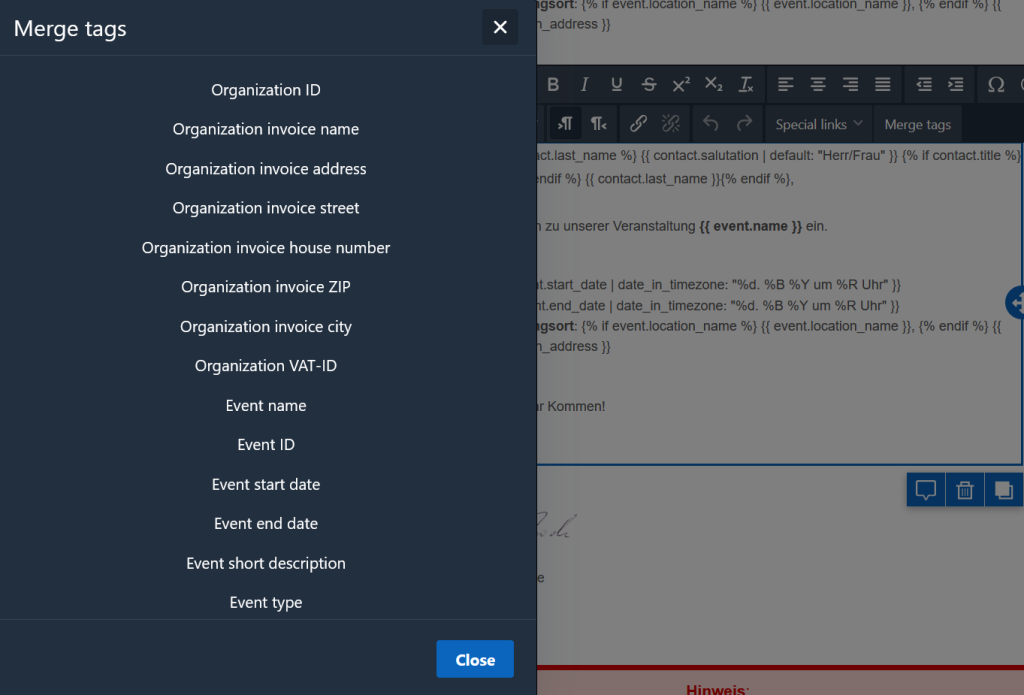
To insert merge tags, click on “Merge Tags” in the toolbar of the text field and select the appropriate placeholder. You can also customize merge tags using the templating language Liquid. This allows you to set conditional rules (“if – then”), provide fallback values, or set date formats. In our article about Liquid, we explain you the basics.
Tip: Merge tags also work in the subject line. You need to manually insert the placeholder text there. It is best to copy it from the email editor.

2.2. Special links
Special links are links with specific functionality. They can be added behind text, buttons, or images.

The following special links are available to you:
- Unsubscribe: We recommend including the link in all marketing emails to give your contacts the option to unsubscribe from your emails. You do not need an unsubscribe link for auto-emails that function as transactional emails.
- Google Calendar (only email messages): Insert a link that directly adds a calendar entry to Google Calendars. For other calendars, we recommend the “Calendar Entry” attachment.
- Register (only email messages): Insert a link with configurations for registration via doo. You can pre-fill a code or contact details or set a ticket category, for example.
- Maybe (only email messages): Insert a maybe link to track who is unsure about attending your event.
- Decline (only email messages): Insert a decline link to track who is not attending your event.
You can find more information about invitation links (register, maybe, decline) and RSVP campaigns in our guide for email messages.
Tip: In addition to special links, you can also use URL parameters to create links that control the behavior of the doo widgets. Learn more about this in our technical documentation on widgets.
3. Mobile view and design for mobile devices
Nowadays, emails are often read on mobile devices such as smartphones or tablets, not just on desktops. Even in a business context, emails are sometimes checked on the way to work. Additionally, the display areas vary depending on the email program and screen size, even on desktops.
Therefore, it makes sense to optimize every email for mobile devices and make them responsive. Responsive means that the email adapts to the screen size.
The doo Email Editor is designed to create responsive emails. Even if you do nothing, many things in your email will already work on different devices. However, we still recommend considering the mobile view during the design process and testing it, as the devil is in the details and some settings will require fine tuning.

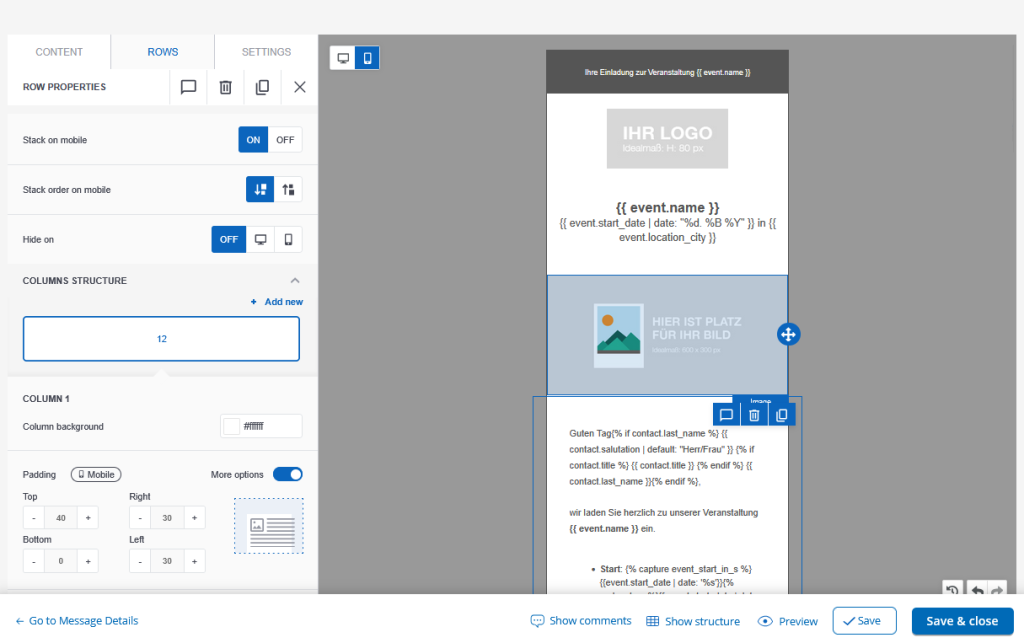
Using the view button in the left corner of the content area, you can switch between desktop and mobile design views at any time. With the mobile settings, you can adjust the design for smaller screens without changing the desktop version:
- With the “Stack on mobile” setting, you can specify whether individual columns should be stacked vertically on mobile devices (“on”) or displayed side by side as on desktop (“off”). You can set the stacking direction using “Stack order on mobile“.
- The “Hide on” setting allows you to completely hide rows on desktop or mobile. This is useful if you want to design a row specifically for desktop and fundamentally different for mobile.
- For the padding of columns and content, you will see a “Mobile” label – you can set padding that only applies to mobile.
- For images, you can also set the alignment separately for mobile devices. These settings are also marked with the “Mobile” label.
In the email preview, which you can access via the button in the footer of the email editor, you can switch between desktop and mobile views. We recommend opening and checking the email on a mobile device during test sending before sending it for real.
