Use Liquid code in emails for individual personalization
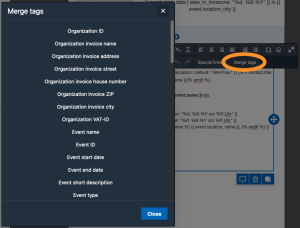
Do you want to address your email recipients personally by name? Do you want to avoid manually typing the event name, address, and date in your emails, and instead have the data automatically adjust according to the event? Do you want to avoid manually entering your billing address and instead use the disbursement settings so that the data automatically changes when you adjust it there? For this, you need merge tags. Merge tags are placeholders for values that are replaced with the current values from the doo Manager App when the message is sent. You can learn how to insert merge tags into an email in the article on the doo Email Editor.
Sometimes, however, you don’t just want to adopt the stored values one-to-one, but rather adjust them. For example, you might want to output a date in a specific format, set a fallback value if a field is empty, or insert conditional content using if-then logic. This is possible with auto-email and email messages by customizing the merge tags with Liquid.
Liquid is a template language developed by Shopify. A detailed description of all possibilities with Liquid can be found in the official documentation. Below you will find a brief introduction and overview of frequently used customizations with Liquid:
- Adjust values from merge tags with Liquid filters
- Implement more complex logic with Liquid tags
1. Adjust values from merge tags with Liquid filters
When you insert a merge tag into your email, it is marked as such by two curly brackets: {{ merge_tag.name }}. The text between the brackets is the name of the merge tag, and it is always in English. When working with the extensive Liquid documentation linked above, a merge tag corresponds to an object.
Instead of outputting the value stored in doo one-to-one with the merge tag, you can change the output using so-called filters.
For example, take the merge tag for the salutation: {{ contact.salutation }}. Insert | and the desired filter within the placeholder, for example {{ contact.salutation | default: “Mr/Ms” }}. In this example, if no value is stored for “salutation” for the contact, the fallback value “Mr/Ms” is used.
Some helpful filters for you are listed in the table below. More detailed information can be found in the full Liquid documentation linked above.
| {{ … | capitalize }} | The input value is capitalized, e.g. john -> John. |
| {{ … | date: “%a, %b %d, %Y” }} | Dates are rendered in a different format, e.g. Fri, Jul 17, 2025. Use the srftime documetation to get your format. |
| {{ … | default: “Mr/Ms” }} | Merge tags are assigned a default value if no data is present. |
| {{ … | downcase }} | The input value is written in lowercase, e.g. John -> john. |
| {{ … | first }} | Returns the first value of an *array, e.g. for the array ” blue, green, yellow” the value “blue”. |
| {{ … | join: ” and ” }} | Joins values of an *array with the set separator, , e.g. for the array ” blue, green, yellow” the value “blue and green and yellow”. |
| {{ … | last }} | Returns the last value of an *array, e.g. for the array ” blue, green, yellow” the value “yellow”. |
| {{ … | prepend: “Answer: ” }} | Prepends the provided value (Here Answer: ) to the value obtained from the merge tag. |
| {{ … | replace: “his”, “their” }} | Replaces the first word (Here his) with the second word (Here their). |
*Array: An array is a collection of values. Contact groups, for example, are output as an array because a contact can belong to multiple contact groups. To resolve arrays and obtain specific values from them, Liquid provides various filters and tags. The “Iteration” section of the full documentation linked above can help you resolve arrays. The values in arrays are numbered, with the first value having the number “0”.
2. Implement more complex logic with Liquid tags
With Liquid code, it is possible to implement more complex logic and conditional content in emails. For example, you can define content that varies depending on whether an event is virtual or not, whether a contact comes from a specific country, or belongs to a specific contact group. This allows you to better tailor content to your event or provide personalized information to your recipients.
To use Liquid correctly for this purpose, it can be helpful to have basic programming experience. In any case, make sure to thoroughly test your email when implementing more complex logic with Liquid. In addition to the filters already mentioned, Liquid provides so-called tags for this purpose. These are recognized by the syntax {% tag %}. Using tags, you can, for example, resolve arrays or implement if-then logic. If you want to delve deeper into these possibilities, feel free to use the full Liquid documentation linked above. Below, we provide some examples that may be useful to you in the context of doo.
2.1. Display text or value only in specific cases
This code displays the text “To participate in this event, you must have completed the corresponding basic course.” if the event name contains the word “Advanced Course”.
{% if event.name contains "Advanced course" %}To participate in this event, you must have completed the corresponding basic course.{% endif %}
This code displays the text “This event is a webinar and will be held digitally.” if the event is stored as a virtual event in doo.
{% if event.is_virtual %}This event is a webinar and will be held digitally.{% endif %}This code displays the title of a contact only if a value for the title is stored.
{% if contact.title %}{{contact.title }}{% endif %}
2.3. Text for contacts in a specific group
This code displays the text “For our VIPs only: Present this email at the bar to receive a free cocktail.” if a contact is in the “VIP” contact group.
{% capture grouplist %} {% for group in contact.groups %}{{ group.name | join: " " }}{% endfor %}{% endcapture %}{% if grouplist contains "VIP" %}For our VIPs only: Present this email at the bar to receive a free cocktail.{% endif %}