Certificates & Co: Create custom documents
In addition to personal tickets for the entry, many event organizers give out further documents to attendees that need to be personalized, such as training certificates or confirmations of participation. Such documents don’t need to be created manually with the data from the downloaded attendee list: after the required setup, you can create personalized documents for your attendees directly in doo with just one click. As an organizer, you have full control over the creation: you decide which document template is stored for your event, when and for whom the documents should be created and how they should be made available to the attendees.
If you are interested in this feature, please contact your doo contact person or our Support Team for an individual offer. On this page you will then find all the information you need to set up and use the function.
1. Setting up a document template
Similar to the individual ticket designs, these custom documents are also based on individual templates that first need to be set up for your doo organization account. It is possible to set up several templates for your account if you need to generate more than one document per attendee or if you need different templates for different event types.
1.1. Providing a template design
After ordering the personalized documents feature we need a template in your desired design in Din A4 format as PNG file, which will be used as background for your attendees’ certificates.
In order to be able to personalize the document for each attendee, our team will insert placeholders on your template – there are placeholders for attendee, booking and event information.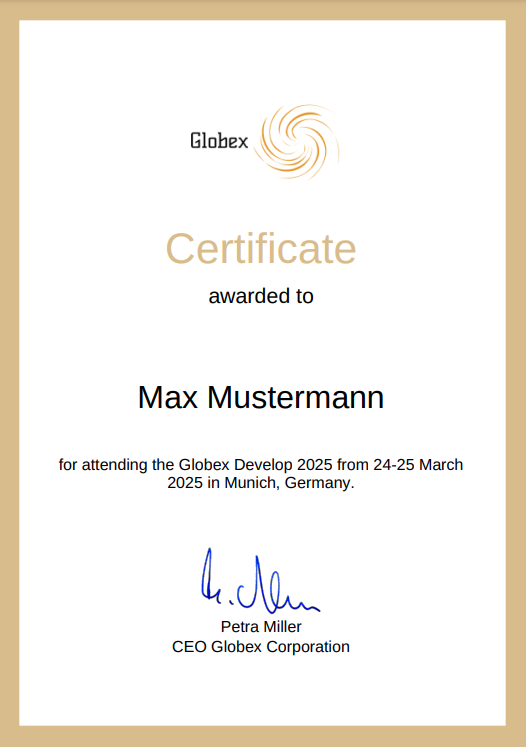
Do you want to display the address, the ticket category and products, e.g. additional workshops, that were booked or answers to attendee questions on the document in addition to the attendee’s name? If you plan to use the document for multiple events, please also define where you want to insert the placeholders for event name, date and location and, if applicable, description.
The easiest way to show us how the final document should look like is to send us two versions of your template: One without the attendee, booking and event data, which we can use as a background, and one with sample data, so that we can see where and how the corresponding place holders should be inserted. Please also tell us the font color (hex code) the respective data should be displayed in.
Please send the template to your operative doo contact person or to the doo Support Team with the indication of the organization ID for which the template should be created.
If you need the documents in different languages, please send us one version per language, as a separate template is required for each language.
The creation of the documents usually takes a few working days. As soon as the creation is finished, you will receive the design ID(s) from our team, which you can use – as described in the next step – to createthe document in your doo account.
1.2. Managing the document settings
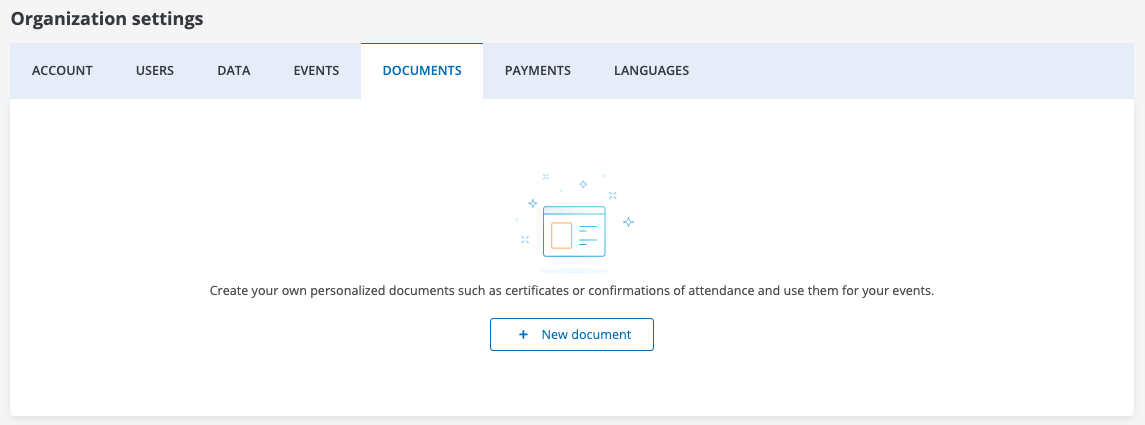
Once our team as created the template for your account, the corresponding document needs to be created in the organization settings so that it can be used for your events afterwards. Only team administrators can access the organization settings by clicking on the gear icon in the top right corner.
To create a new document, please switch to the “Documents” tab and click on “New document”.
In addition to the internal name, which is displayed to you as organizer within the doo Event Manager, you can assign a file name for the PDF document. Furthermore you can define the label towards the booker, which means the link text that should appear in the booking portal, via which the attendee can download the file.
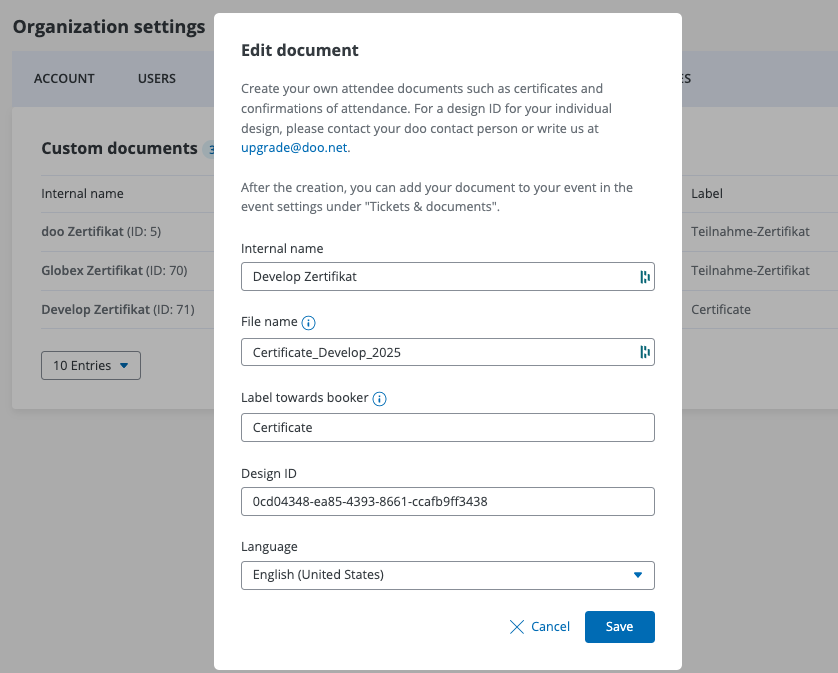
Please insert the design ID which you received from doo to assign the appropriate template to the document and select the language of the template. If you offer booking processes in German and English and would like to create documents for your attendees in their respective booking language, you would have to create two documents and link them to the respective design IDs.
If you are working with more than one language, we recommend including the language into the internal name of the document (e.g. “Participant Certificate (DE)”) to make it easier for you to assign it later.
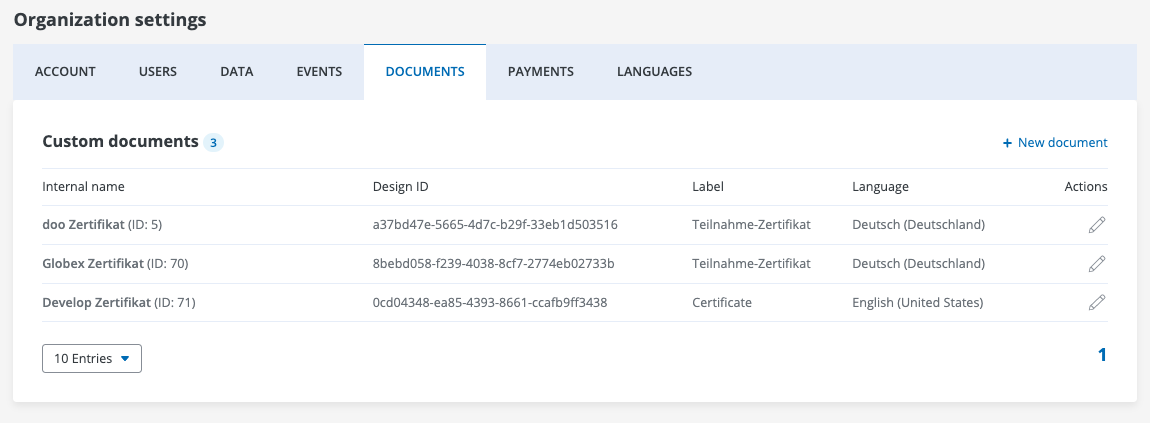
After saving the settings, you can see the document in the overview and go back to the edit mode by clicking on the pencil icon.
1.3. Assigning a document to an event
To assign a document to an event, please open the corresponding event details page and select “Tickets & Documents” from the event settings menu on the right.
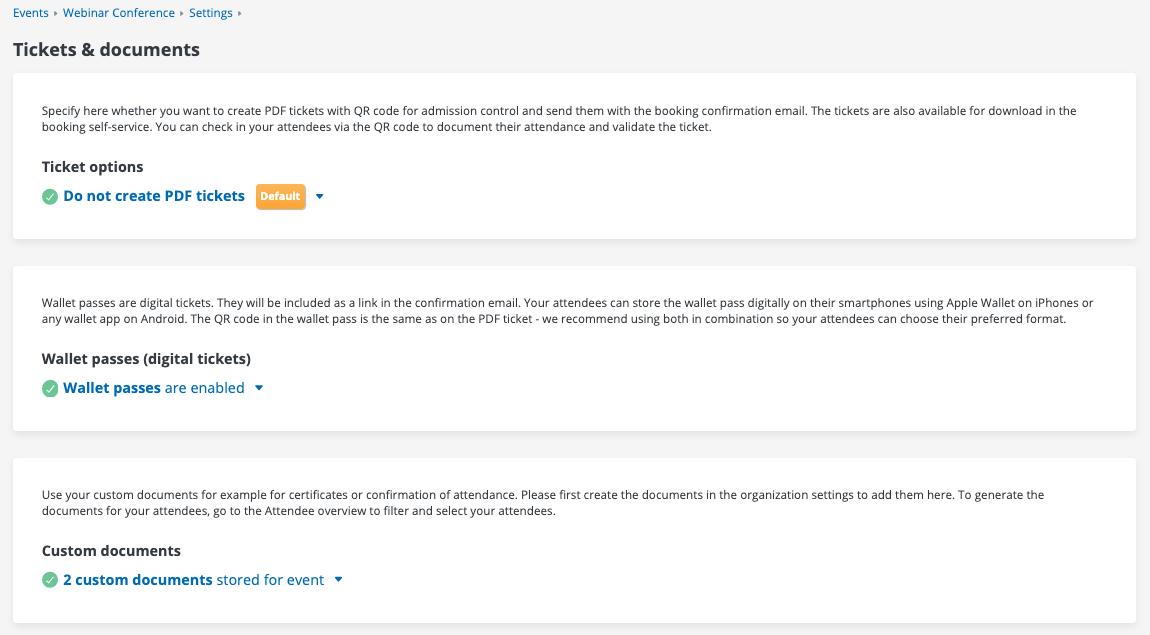
Scroll down to the “Custom Documents” section and click on the dropdown “No custom documents used for event”. Via “+ Add document” you can select the corresponding document based on its internal name.
Using the “Provide document for download in the booking self-service” button, you can enable your attendees to download their documents from their booker self-service center. In the column “Download link in booking self-service”, you can double check how you named the download link in the organization settings.

After saving the selection the document is assigned to your event and you can start creating custom documents for your attendees.
Via “+ Add document” you can assign further documents to the event in case you are working with more than one language or need to create more than one document per attendee.
1.4. Testing the document generation
As soon as you have successfully created a document in your organization settings and assigned it to an event, you can register for your event yourself via manual registration and generate the document for yourself on a test basis – as described in the next step – in order to check whether everything is displayed as you wish and the personal data is arranged correctly.
2. Generate custom documents for your attendees
2.1 Generating a document
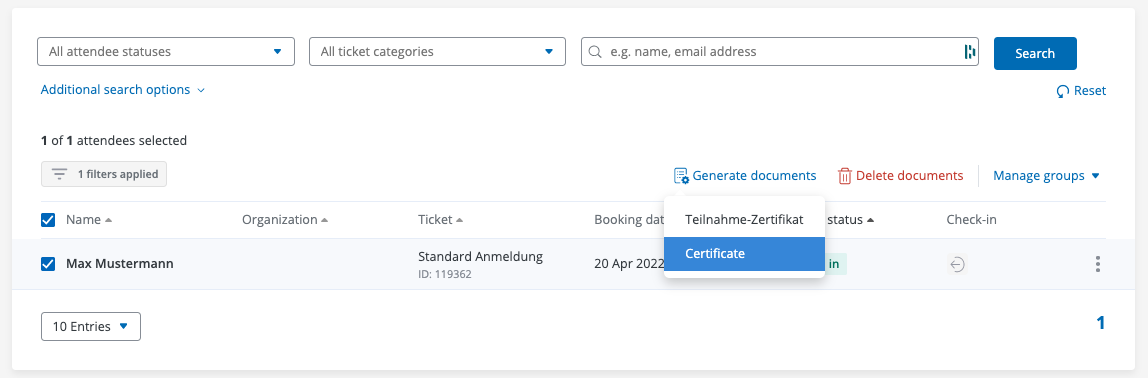
Custom documents for your attendees can be generated on the attendee overview of an event, which you can access via the respective event details page.
Please select the attendees that should receive the document by using the checkbox in the first column of the list. If you would like to create documents for all attendees who have checked in, you can filter the list accordingly and then mark all attendees of the filtered list. By clicking on “Generate documents” and select the desired document the files are generated for the corresponding attendees. Depending on the file size and the number of attendees the generation of the personalized documents might take some time.
2.2 Downloading the document
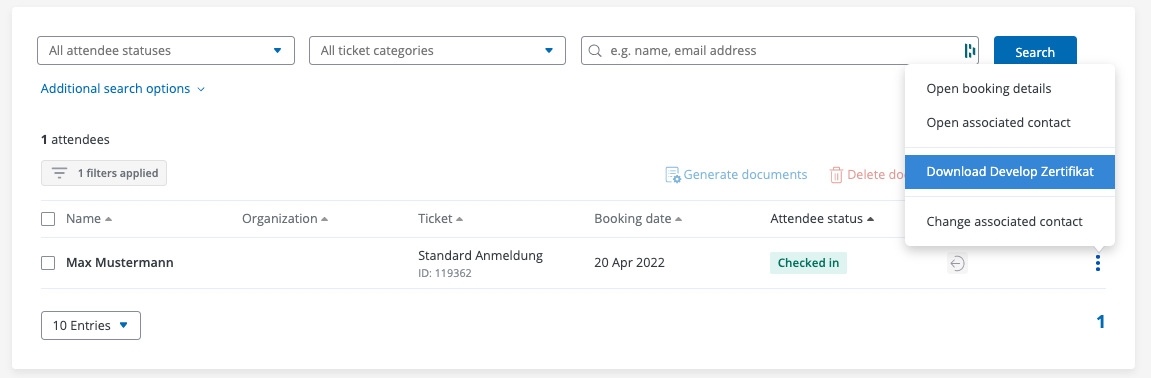
Once the creation is complete, you’ll see an option to download the customized PDF of an attendee when clicking on the three dots in the last column of the attendee’s row. When clicking the link, you can download and open the respective document.
Instead of downloading each attendee document individually, you can also download them all together as a ZIP file. To do so, just click on “Download all documents” at the top of the attendee overview. That way, you can save all documents for yourself internally or send the individual documents manually to your attendees by mail or email.

3. How the attendee can access his document
You don’t have to manually download and send the documents to each attendee individually: doo offers the following two options that can save you a lot of time and manual work.
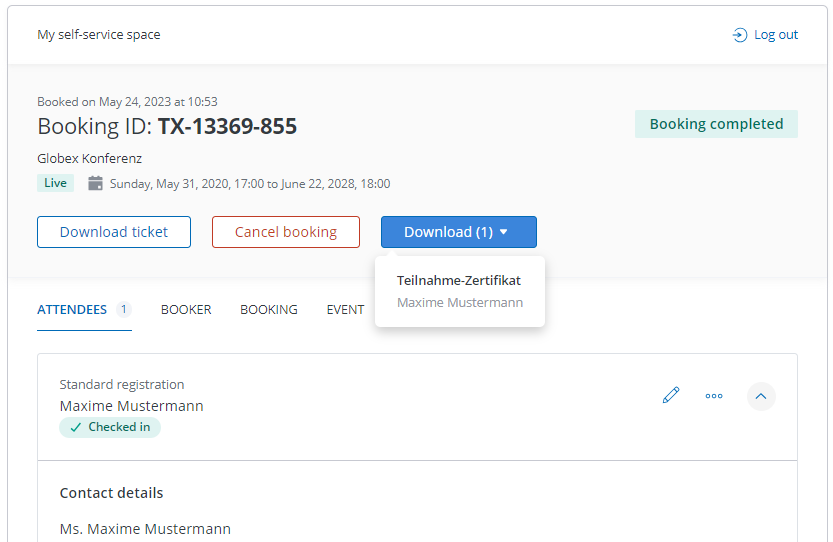
3.1. Download from the booker self-service
After you have generated the documents for your attendees in the attendee overview, you could contact them via an doo email message and inform them that their certificates are now ready for download in their personal booking self-service. Please check in advance that you have activated the booker self-service in general, as well as the document download function (see 1.3) in the event settings, to make sure that your attendees have actually access to their portals.
To make it easier for them, to find the download link, you could add a short instruction on how to access the booker self-service: They just need to go to your event website again and log into their booker self-service center with their booking number and email address and download their document from them. For more details on the booker self-service, please follow this link.
3.2. Automatic send-out by email
Alternatively, it is also possible to automate the send-out of the documents to all attendees by email. This setup requires the doo Automations feature which needs to be activated for your account first.
With doo Automations you could then individually define when the send-out should be triggered: e.g. each attendee receives his document automatically via email after having checked in or after the end of the event. For webinars you could for example define that only those attendees who attended at least 75% of the webinar should receive their training certificate.
If you are interested in such a solution, please contact your doo couterpart or upgrade@doo.net for an individual offer. Our team will be happy assist you in automating the document send-out according to your requirements and could also help you examine your current event processes regarding further optimization potential through automations.