-
General information
-
Account Settings
- Creating & managing your personal doo account
- Organization settings: Managing your account settings
- User Management: How to Work as a Team
- How to reset your password
- Changing the email address of your doo account
- The doo account packages
- What can I do if a doo site does not load
- Adjusting standard labels and texts of the doo booking process
- How do I delete my account
- Payment Process: How to manage payment options
- Password Security using doo: What options are available?
-
Events
-
- Edit email contents
- Using placeholders in booking email templates
- How to adjust invoice contents
- Attendee tickets and QR code scanning
- How do doo tickets look like?
- E-mail attachments for bookers and attendee
- Certificates & Co: Create custom documents
- Define your own booking conditions
- Revenue Disbursement: Entering and editing invoice address & bank account information
- Create bilingual (multilingual) events
- Bookings with manual approval
- Create a waiting list
- Access codes and promotion codes: Discounted tickets for your participants
- General Event Documents: Share Presentations and Materials with Attendees
- Event Staff: Restricted user access for specific events
- doo Widgets: Integration into your own website
- doo Default Event Website and Custom Event Website
- How to create a booking process in english
- Overview: Providing event documents such as flyers, presentations or certificates
- How does the booking process work for my attendees?
- How do I make test bookings?
- Creating exclusive registration access for selected contacts
- Delete ticket categories & change prices and sales periods after go-live
- Cancellation of events
- What are event fields and how do I use them best ?
- Shorten the booking process and prefill data: How to make the booking process as convenient as possible for bookers
- Tips for virtual events with doo
- Integration into your own Facebook page
- Event Templates: Creating templates for your events
-
Manage Bookings
- Manage bookings and attendees
- Monitoring incoming bookings
- The attendee overview
- Invitation list: Track the registration status of specific contacts
- Manual registration
- Resend automatically generated emails
- Rebooking: How to change existing bookings
- Cancellation & Refund Handling
- Booking self-service: Allow bookers to subsequently access and edit their bookings
- Download booking overview and attendee list
- Change of attendee data and invoice address
- Bank transfer: How to deal with pending transactions
- What to do, if someone has not received their confirmation e-mail or ticket
-
Contact Management
- Contacts: Introduction and Topic Overview
- Contact details: Collect cross-event contact information
- Overview contact data fields
- Managing contact data fields
- Creating contacts - How do contacts get into the doo contact center?
- Contact import - Bulk creation and editing of contacts
- Managing existing contacts
- Creating and managing contact groups
- Datamatching & Synchronization of booking data and doo contact
- Email subscriptions: Double opt-in & opt-out options at doo
- Deleting contacts
-
Emails
-
Websites
- The doo website editor: create an individual event page
- Mobile optimization: Customize your site for all your devices
- Installing different tracking tools on the website
- Creating a SSL certificat (HTTPS) to ensure data security
- Website Tracking: How to integrate doo into your Google Analytics
- E-Commerce dataLayer-Events in our Widgets
-
Additional Functions
- Optional Service: Refund handling via doo
- Ticket design: How to get your ticket in the desired design
- Forms - Set up surveys and feedback requests for your attendees
- Embedded Reports
- Customer specific sender emails
- Add calendar entries to your event communication
- Filtered cross-event widgets: How to show only selected events
- Widgets and Accessibility
-
Automations
-
Booker & Attendee FAQ
-
On-Site and Attendance
Booking self-service: Allow bookers to subsequently access and edit their bookings
In the booking self-service, your bookers can view their personal data after registering and download related documents such as tickets, invoices, or personal documents. Additionally, you can give your bookers the option to edit their data afterwards (Enterprise) or to cancel their booking themselves in case of free events (Pro, Enterprise).
1. How to Activiate the Booking Self-Service
The booking self-service can be enabled or disabled for each event individually. To enable the function for your bookers, go to the corresponding event details and select “Bookings” from the menu on the right under “Settings.”
Scroll down to the last point “Booking self-service.” Here you can turn the option on or off.
For your bookers to log in to their booking, they need to enter their booking data for authentication. This includes the booker’s email address and a booking identifier. For the latter, you have two options:
- Booking Login Code (default for new events): This is a randomly generated 15-character code consisting of numbers, uppercase, and lowercase letters (e.g. G3f5Ge443mo1Pt). This option is more secure.
- Booking ID: Alternatively, you can use the booking or invoice ID (e.g. TX-12345-123456).
Select your alternative by choosing the respective option in the dropdown behind the underlined text.

The booking self-service is available to your bookers for 30 days after the end of the event.
Tip: Keep on reading to find out how your bookers can access the booking self-service.
Important: You can deactivate the booking self-serivce or change the authentication method at any time. Please note, however, that changes may lead to links that have already been sent no longer working. Once enabled, the booking self-service is available for all new and existing bookings. If you subsequently activate the booking self-service, we recommend that you select the booking ID for the login, as this is also known to bookers who have already booked before the booking service is activated.
1.1. Enable Bookers to Edit their Data
Reduce the workload for your event team by allowing bookers to edit their data themselves. Bookers can, for example, correct the invoice address or email address, or change attendee names. It is also possible to add free products to the booking afterwards.
As an Enterprise customer, you can enable the editing function for your bookers. To do this, turn on the option “Bookers can edit their booking”. If you provide an email address, you will receive an automatic notification email for each change made by bookers. The booker will always be automatically informed of the changes they made via email.
1.1. Enable Bookers to Cancel their Booking for Free Events
For free events, Pro and Enterprise customers will also see the option “Bookers can cancel their booking”. By enabling this checkbox, you allow your bookers to independently cancel their booking without having to contact you.
Optionally, you can also specify that the contact person of your doo account should be informed via email about cancellations initiated by the booker.
2. How Bookers Can Access the Booking Self-Service
There are several options how a booker can get to the booking self-service
- Login via the link on the event website or the confirmation page
- Via the link in the booking emails
- Via parameters in a link or in the widget code
2.1. Login to the Booking Self-Service
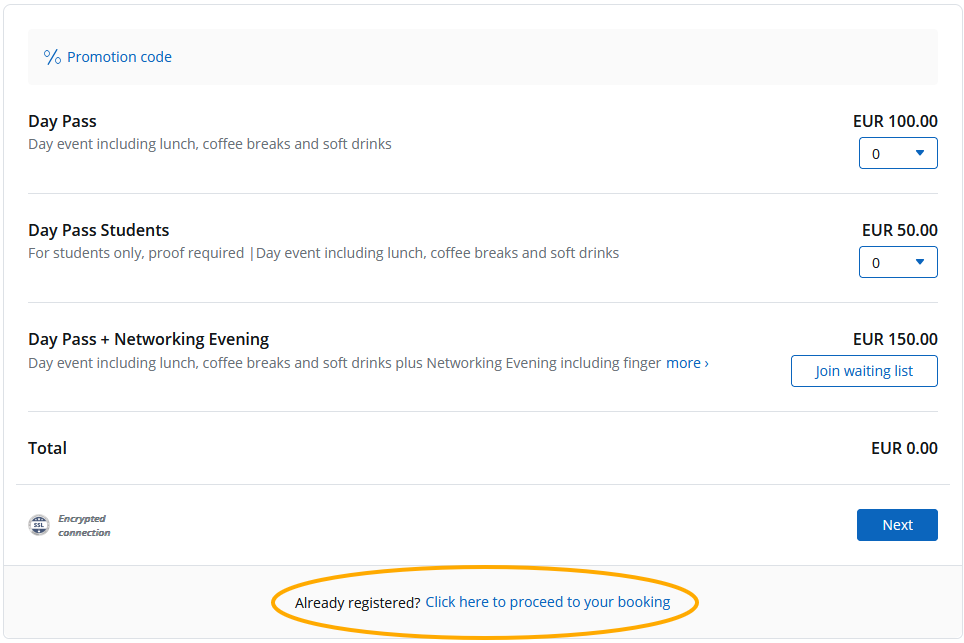
As soon as you have activated the booking self-service for an event, the link to the booking self-service will automatically appear on both the standard doo event website and in the widgets with the following text: “Already registered? Click here to proceed to your booking.”
After booking, bookers have the option to log in directly to the booking self-service via a link on the confirmation page. They can also see the data (booking login code, booking number, and booker email address) on the confirmation page. This allows them, for example, to correct their email address if they made a typo or to download their tickets without waiting for the email.
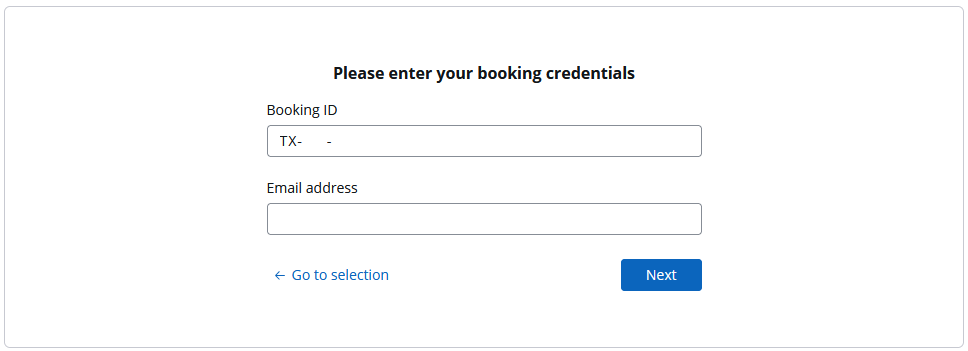
To access the booking, the booker simply needs to enter the booking login code or the booking number and the email address.
2.2. Link in Booking Emails
To ensure your bookers can access the booking self-service afterwards, we recommend including the link to their booking self-service in the booking confirmation email. You can find all the information on editing the content of automatic booking emails here. Remember to include the link to your own event website if you do not want to use the doo standard event website. You can find out how to do this in the article about the event website.
Tip: If you prefer your own text, you can incorporate the link into the text using placeholders.
2.3. Control the Booking Self-Service via Parameters
By attaching parameters to the URL of a page with the widget embedded or by inserting them in the widget code, you can direct your bookers to the login page for the booking self-service or even directly to the logged-in booking self-service. Detailed instructions for the parameters can be found in our technical documentation.
This option is useful, for example, if you
- send emails from a third-party system in which you want to include the link.
- provide the booking self-service in a protected area, such as an intranet or member area, and bookers should not have to log in separately.
want to provide access to the booking self-service on a page that does not first show the booking process.
3. What Will Your Bookers See in the Booking Self-Service
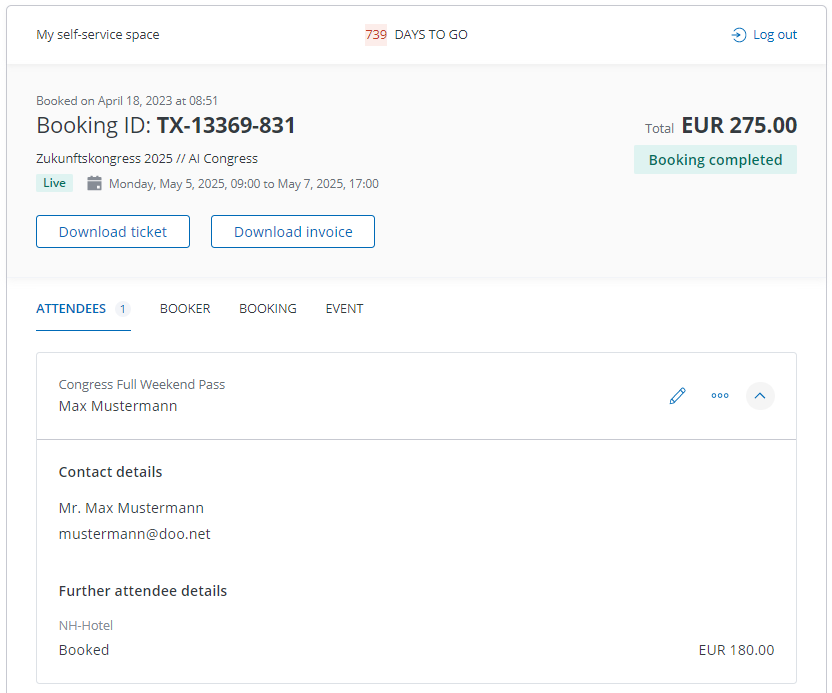
Ingeneral, the booking self-service is similar in structure to the booking details you see when you access a booking through the booking overview in the doo Manager App.
At the top, bookers see a summary with the most important key data. In the tabs, they can then access the details of attendees, the booker, the booking itself, and, if applicable, the invoice and the event.
Depending on the settings for the event and the status of the booking, bookers can:
- Download their tickets
- Download their invoice
- Download their custom documents such as certificates
- Edit attendee and booker data, as well as add free products
- Cancel the entire booking for free events
- Complete the payment for open bookings
Access the event terms and conditions (such as T&Cs and data protection)
3.1 How Bookers can Cancel by Themselves
If you have activated the cancellation option for your free event, your bookers will see a “Cancel Booking” button in their booking self-service.
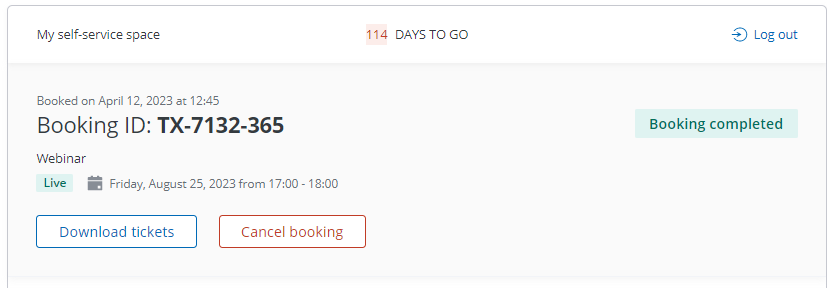
If they click the button, a confirmation dialog opens to prevent accidental cancellations. After confirmation, the booking is displayed as canceled in the booking self-service, and any tickets that were previously available are no longer available for download.
The booker receives an automatic email with the cancellation confirmation. If you have set this in the settings, the doo contact person of your doo account will also be informed of the cancellation.
Note: Partial cancellations of individual tickets or products cannot be carried out by the booker themselves but only by the organizer.
3.1 How Bookers can Edit Their Data by Themselves
If you have activated the editing function for the event, the booker can edit the data for bookers and attendees in their respective tabs in the booking self-service by selecting the pencil icon. This way, they can change their answers to the attendee and booker questions and, if available, add free products by checking the corresponding checkbox.
It is not possible, however, to change ticket categories, cancel individual tickets or products, or add additional tickets and paid products. Independent cancellation of an entire booking is only possible for free events.
After making changes, the booker receives an automatic confirmation email about the successful change, possibly with the updated booking documents (tickets and invoice) attached.
If you have activated the optional email notification function, you will also be informed at the email address you specified in the settings that a booking change has taken place.
Important: The email notifications do not indicate what changes were made. The content of the notification emails cannot be customized by default. If you still want to provide individual text for the booking emails, please contact your doo representative or email upgrade@doo.net for a corresponding offer.
By default, the changes made by the booker afterwards only affect the booking itself. The updated data regarding the booker and attendees will be displayed accordingly on the booking detail page as well as in the booking overview or attendee list, but not adopted for the contact details stored in the contact center for the booker or attendees.
If you want changes to the booking and attendee data to be adopted in the doo contact center and overwrite the data there, you can activate “Data synchronization between booking data and doo contact” in the organization settings beforehand. You can find more on this topic here.
You can see that and when a change has been made by the booker in the “Last Changed” column of the export booking overview. You can also display all changed bookings in your online booking overview by selecting “Last Changed” in the dropdown under “Additional Search Options,” specifying a relevant time period, and then filtering the bookings.
Important: If you activate the post-booking editing function and it is used by your bookers, the original booking and attendee data will be overwritten. The original data will then no longer be available. If you want to use the function but still want to track the changes later, we recommend setting up an interface between doo and your CRM. If you are interested, please contact your doo representative or email upgrade@doo.net with the exact requirements for a corresponding offer.