User Management: How to Work as a Team
doo organizations with a Pro or Enterprise license have the option to work in a team by inviting multiple people to their organization account. Each invited person can create their own personal doo user account with individual login credentials, which then grants them access to the doo Event Manager of the respective organization. If a user is added to additional doo organizations with their personal account—for example, to the doo organization accounts of other business units—they can use the same personal user account to access these organizations and switch freely between them.
1. Managing users
To manage the users of your doo organization, click the gear icon in the header bar to the left of your name and open the “Users” tab. Please note that only team members with the “Administrator” role have access to the organization settings. If you do not see the icon in your header bar, please contact your administrator.
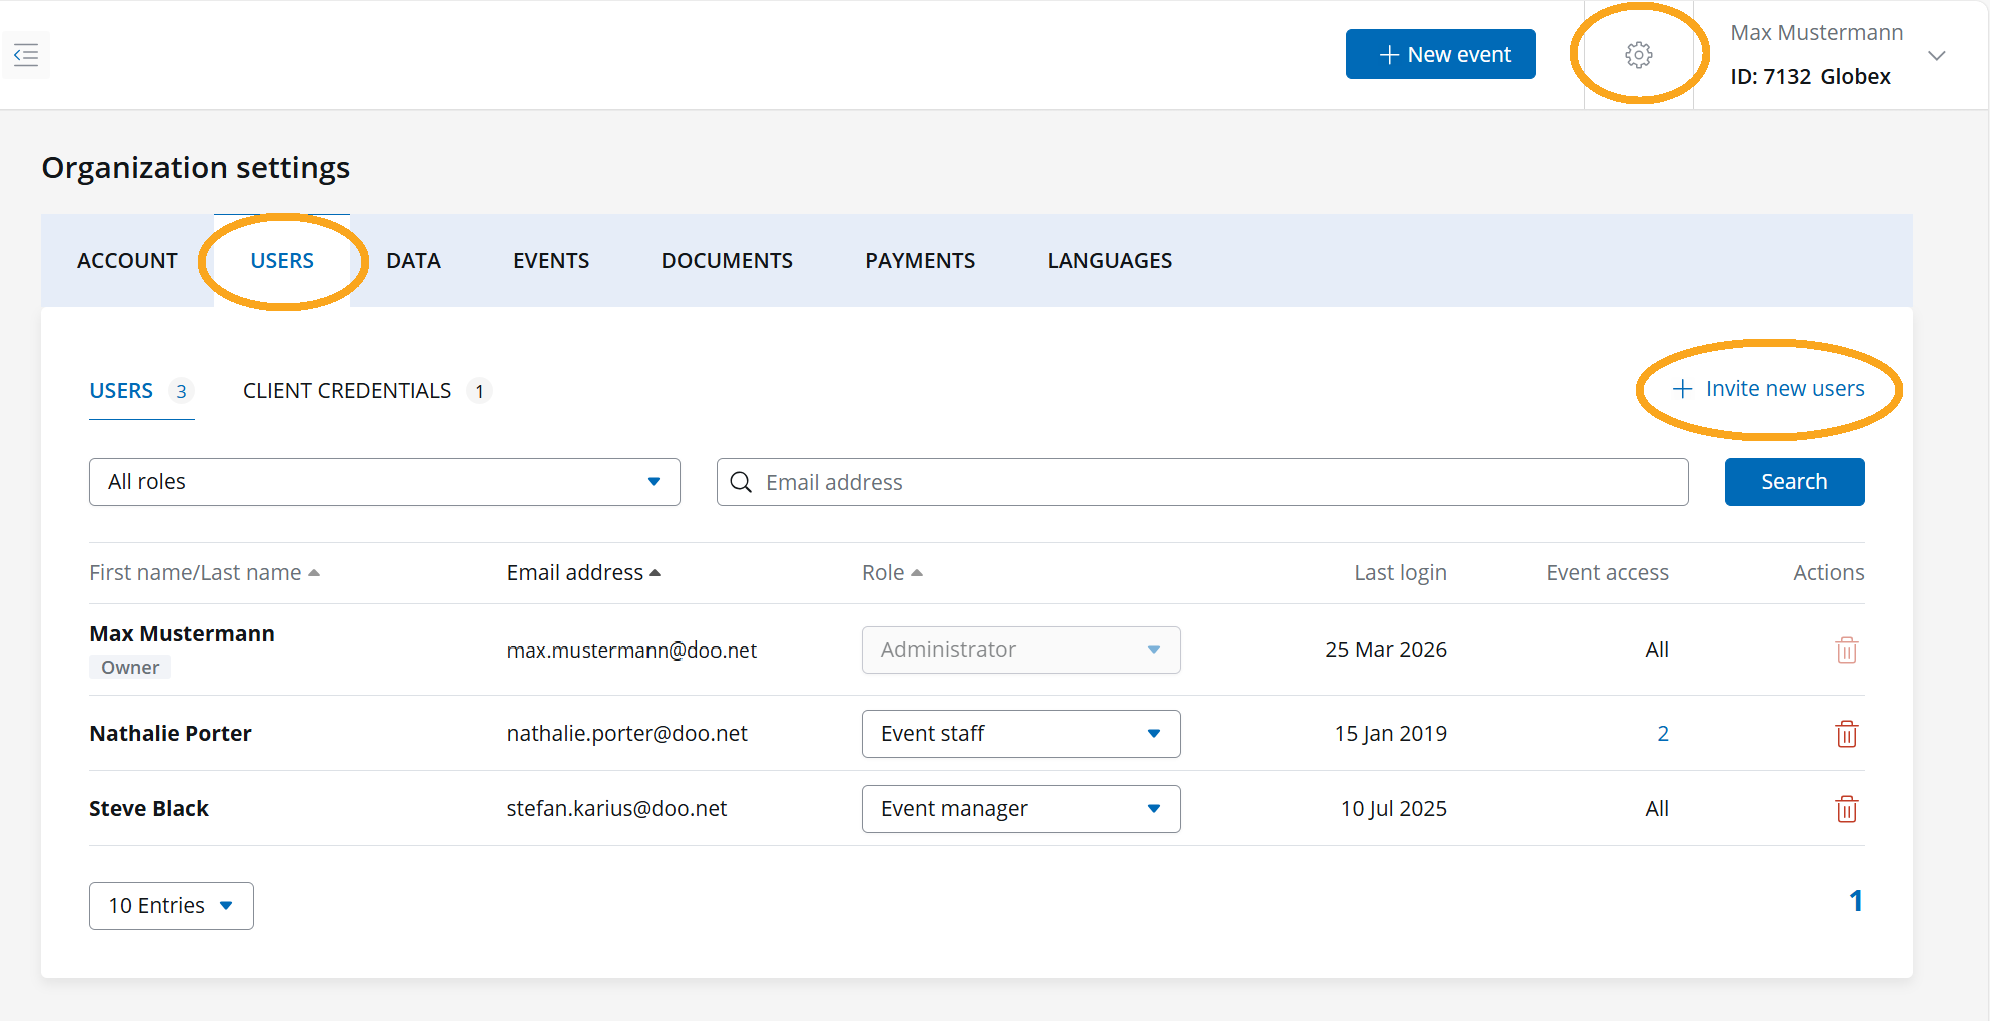
The overview displays all users who have been invited to your organization account, along with their role and the date of their last login. You can also see how many events are assigned to each user.
For event staff, you can click on the number to view the assigned events in the next step and remove them if necessary.
1.1 Adding new users
1. To invite a new user to your organization account, click “+ Invite new users” in the top right corner.
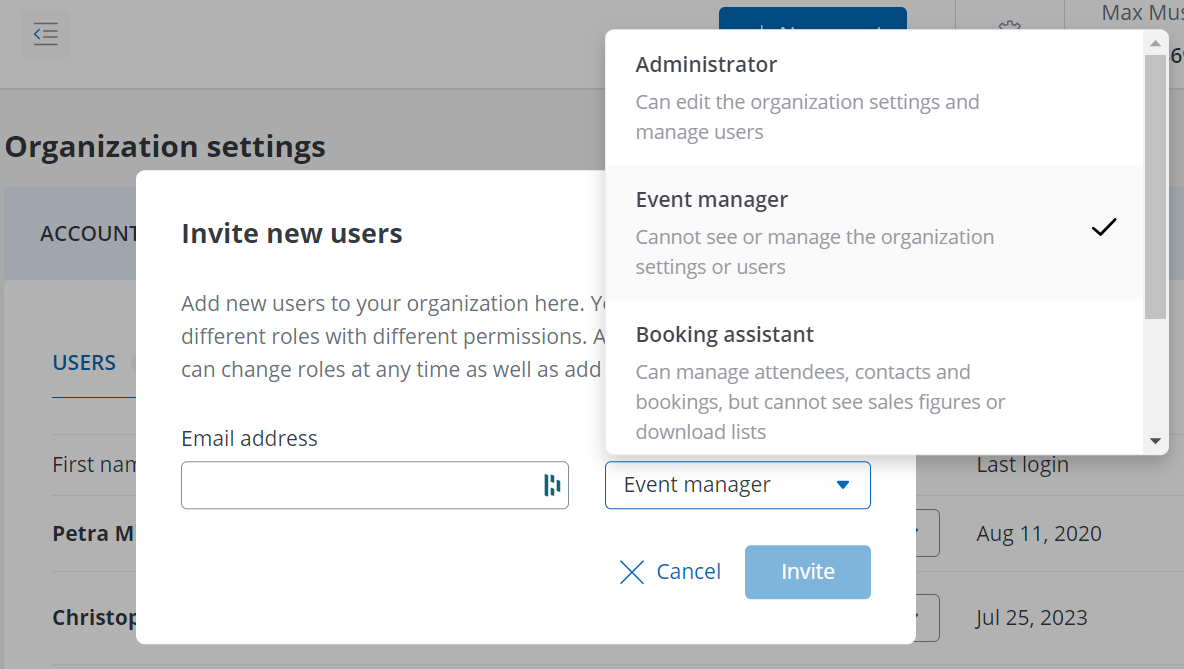
2. Enter the email address of the person that should be invited to your organization account.
3. Assign a role to your future team member:
- Administrator: Has full access to your organization account, including the possibility to manage the access rights of team members
- Event Manager: This member has the same rights as an administrator, but cannot access the organization and team member settings as well as the settings of your revenue disbursement
- Booking assistant: This member can manage attendees, contacts and bookings, without being able to see sales figures, download booking lists, edit events or to send out email campaigns
- Read-Only: Has insight into the event overview, bookings and contacts but cannot edit them
-
Event staff: Members can only access selected events and their associated booking and attendee overviews, the invitation list, and, if applicable, the check‑in management. You can grant access to the relevant events after the invitation has been accepted via the respective event settings. Instructions on how to do this can be found in the article on event staff.
4. Click on “Invite” in order to send the team invitation to the email address you entered.
5. As soon as the new team member clicks on the link in the invitation email, he can choose a personal password and access your organization account.
1.2 Changing the roles of your members
As team administrator you can adjust the role of a team member at any time via the “Users” tab in the organization settings, choose the appropriate role for the respective user and confirm it.
1.3 Removing team members
In order to remove members from your team, for example because they have not been active in doo for a while (see column “Last login”), click on the trash bin icon in the row of the respective user and confirm the removal. From that moment on, the user will no longer have access to your organization account with their doo user account.
1.4 Changing an email address
It is not possible to change the email addresses of existing members. However, you can remove the user account with the existing email address from the organization at any time (see 1.3) and send a new invitation to the desired email address (see 1.1) to create a new user account that replaces the old one.
1.5 Password security using doo
2. Switching between several organization accounts as a user
If your user account has access to several organization accounts and you would like to switch between them, just click on your name in the top right corner of the the header and select the respective organization from the list.
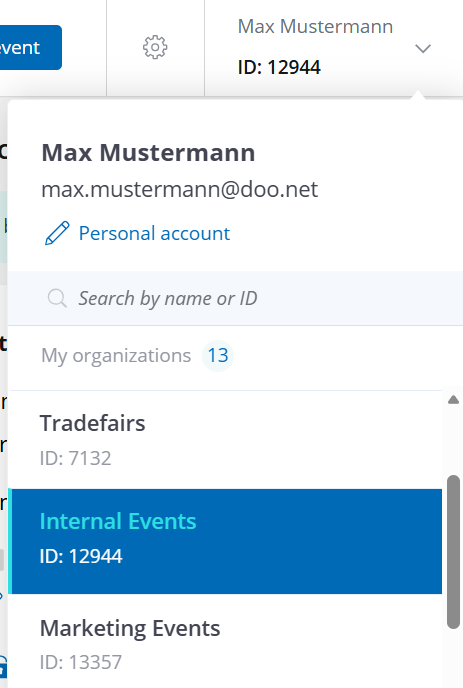
You can check which organization you are currently accessing in the display in the top right corner below your name. Each organization account has an ID, which is shown next to the organization name.
Tip: To better distinguish between organization accounts, we recommend assigning a unique name to each organization in the organization settings. This name will then be displayed next to the doo ID. If no name has been assigned yet, the organization will be listed as “My organization.” You can learn how to change your settings in our article on organization settings.